Loading a Photo with a Carrier Sheet

You can load a large, folded, fragile, or irregularly shaped photo in the input tray using the carrier sheet included with your scanner. Make sure the photo meets the photo loading specifications before loading it.
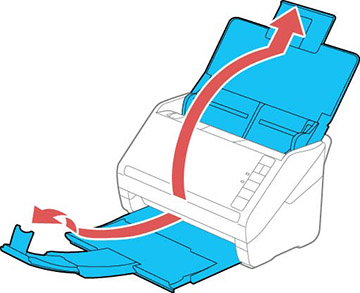
  1. Open the scanner cover, pull up the input tray extension, extend the output tray, and open the stopper.


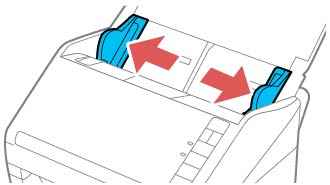
  2. Slide the input tray edge guides all the way out.
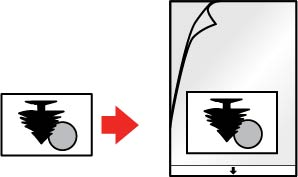

  3. Insert your photo in the center of the carrier sheet with the printed side faceup and the top edge facing the arrow on the sheet.


    Note: If you have a portrait-oriented photo, you can rotate the image after scanning.
  4. Load the carrier sheet in the input tray faceup with the arrow leading into the scanner.
  5. Slide the carrier sheet into the scanner until it meets resistance.
  6. Slide the edge guides against the edges of the carrier sheet.


  7. If necessary during scanning, adjust the position of the stopper and the output tray extension to fit the ejected photos.
    Note: If thicker paper does not eject properly or falls from the output tray, push in the output tray and allow the photos to eject freely onto the surface below the scanner. If the scanned images are affected by the photos ejecting below the scanner, try placing the scanner on the edge of a table where the ejected photos can drop freely.
Related tasks
Scanning Photos with Epson FastFoto
Related references
Photo Loading Capacity