You can load
paper up to this size in the lower paper cassette: Legal (8.5 × 14 inches
[216 × 356 mm]).
Note: Do not
remove or insert the paper cassette during printing.
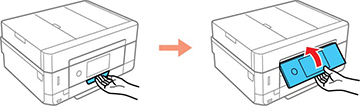
- Raise the control panel, if necessary.
- Close the output tray by
hand or by selecting the
 icon on the LCD screen, if
necessary.
icon on the LCD screen, if
necessary.
- Open the front cover.
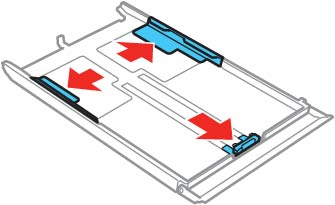
- Pull on the front cover to slide out the lower paper cassette.
- Slide the edge guides outward.
- Set the front edge guide to the paper size you are using.
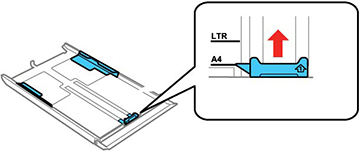
- Do one of the following:
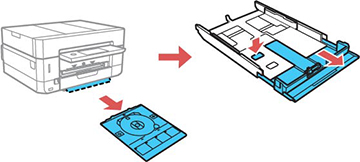
- If you are using legal-size paper, remove the CD/DVD tray from the bottom of the lower cassette. Press the button on the lower cassette and then extend it as shown.
- Insert paper
with the glossy or printable side face down.
Note: Make sure the paper is loaded against the front edge guide and does not extend beyond the rear edge of the cassette.
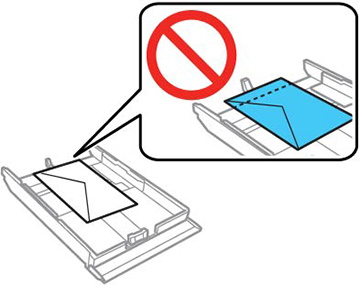
- Insert up to 10 envelopes, printable side down and flap edge left, as shown.
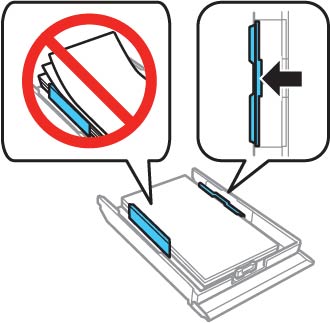
- Slide the side edge guides against the paper, but not too
tightly.
Note: Make sure the paper fits under the tabs on the edge guides.
- Keep the cassette flat as you slide it into your
product.
Note: Leave enough space in front of the product for the paper to be fully ejected. Do not remove or insert the paper cassette while the product is operating.
- Lower the control panel.
- Select the size and type of the paper you loaded on the LCD screen and select Close. The output tray extends automatically when you print.


Always follow
these paper loading guidelines:
- Load only the recommended number of sheets.
- Load paper short edge first and printable side down.
- Make sure the paper is under the tabs on the edge guides and not sticking out from the end of the cassette.
- If you have trouble loading a stack of envelopes, press each envelope flat before loading it or load one envelope at a time.
- Do not load an envelope that is curled, folded, or too thin, or that has a plastic window.
- If print quality declines when printing multiple envelopes, try loading one envelope at a time.
- Check the paper package for any additional loading instructions.