You can load
photo paper and other media in these sizes in the upper paper
cassette:
- 3.5 × 5 inches (89 × 127 mm)
- 4 × 6 inches (102 × 152 mm)
- 5 × 7 inches (127 × 178 mm)
- 16:9 wide (4 × 7.1 inches [102 × 181 mm])
- A6 (4.1 × 5.8 inches [105 × 148 mm])
- B6 (5 × 7.2 inches [128 × 182 mm])
Note: Do not
remove or insert the paper cassette during printing.
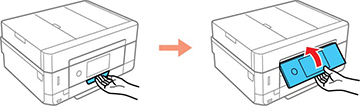
- Close the output tray by
hand or by selecting the
 icon on the LCD screen, if
necessary.
icon on the LCD screen, if
necessary.
- Raise the control panel.
- Open the front cover.
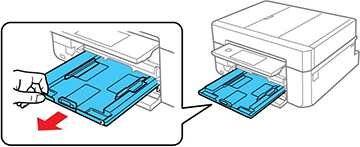
- Slide out the upper paper cassette.
Note: If the cassette is too far inside the product to reach, turn off your product and turn it back on again to reset the cassette's position.
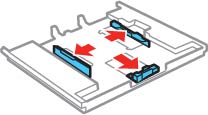
- Slide the edge guides outward.
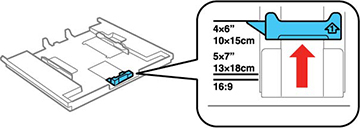
- Slide the front edge guide to the position for the paper size you want to use.
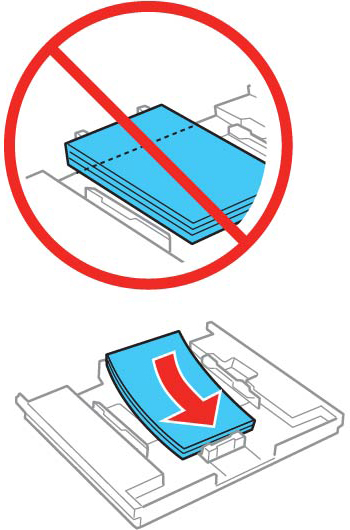
- Insert paper in the cassette with the glossy or printable
side facedown.
Note: Make sure the paper is loaded against the front edge guide and does not extend beyond the rear edge of the cassette.
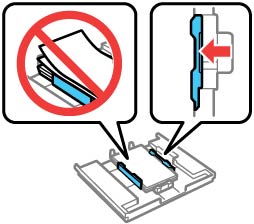
- Slide the side edge guides against the paper, but not too
tightly.
Note: Make sure the paper fits under the tabs on the edge guides.
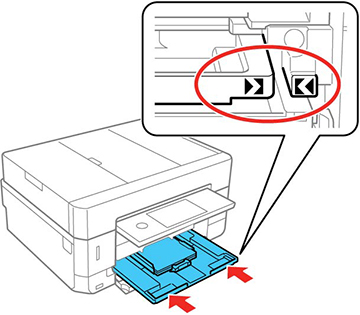
- Keeping the cassette flat, slide it into your product. Align the edge of the cassette to your product using the alignment marks as shown.
- Lower the control panel.
- Select the size and type of the paper you loaded on the LCD screen and select Close. The output tray extends automatically when you print.