To set up
your projector for monitoring and control using a Crestron
Connected system, make sure your computer and projector are
connected to the network.
- Press the Menu button.
- Select the Network menu
and press
 Enter.
- Select Network Settings and press Enter.
Note: If the Remote Password and the Web Control Password have not been set, a screen appears prompting you to set them. Enter passwords up to 32 characters long. These passwords are used for accessing the projector over a network, and you do not need to enter them to access the Network Settings menu after you set them.
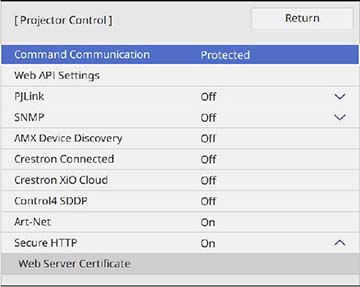
- Select the Projector Control menu and press Enter.
- Set the Crestron
Connected setting to On to
allow the projector to be detected.
Note: Enabling Crestron Connected disables the Message Broadcasting feature in the Epson Projector Management software. To enable the Crestron XiO Cloud service, set Crestron XiO Cloud to On.
- When you are finished selecting settings, select
Return and press Enter to return to the Network Settings menu.
- Select Set, and follow the on-screen instructions to save your settings and exit the menus.
- Turn off the projector, then turn it on again to enable the setting.
- Start your Web browser on a computer or device connected to the network.
- Go to the Epson Web Control screen by entering the projector's IP address into the browser's address box. You see the Web Control screen and a prompt to enter a user ID and password.
- Select the Crestron Connected settings. See the Crestron Web site for details.