See the guidelines here to determine when to perform
maintenance operations on your product, or replace or refill
consumables. If maintenance is not performed, print quality may
decline, the printer's service life may be reduced, or you may be
liable for the cost of any repairs. Always perform maintenance when
a message is displayed on the screen. If you need to perform an
operation, use the links at the end of this topic.
Note: You can set
up certain maintenance operations to run automatically using
settings on your product control panel.
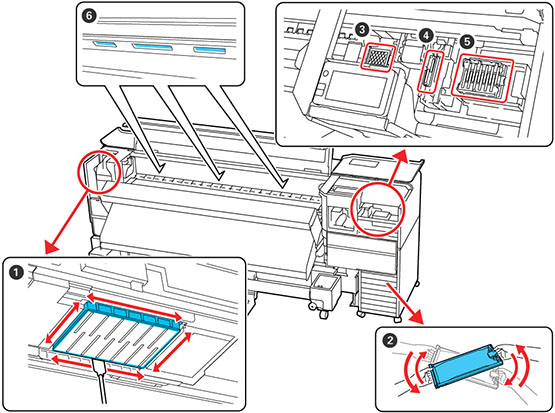
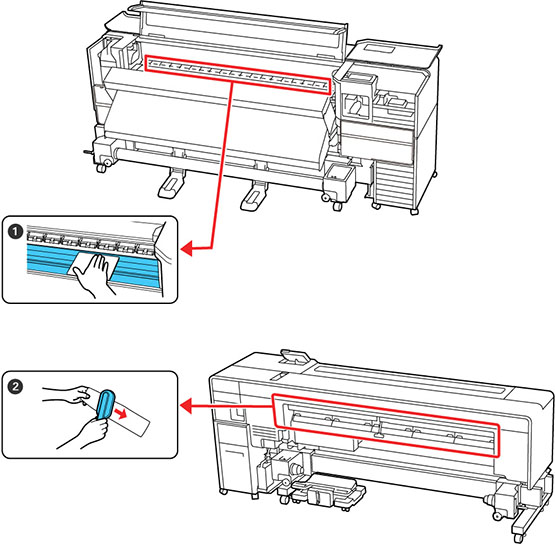
Cleaning Schedule
Do not clean any parts other than those shown in the illustration below, or touch any parts other than those indicated. Doing so may damage the printer or prevent it from printing correctly.
| Number | Area to clean | Frequency |
|---|---|---|
| 1 | Platen and media edge guides | When starting work every day |
| 2 | Media cleaner | When you see a message on the LCD screen to clean the media cleaner |
Note: The printer contains precision
instruments. If any lint or dust adheres to the nozzles on the
printhead, print quality will decline. Perform regular cleaning
more frequently depending on the environment and media being
used.
Consumables and Parts Replacement Schedule
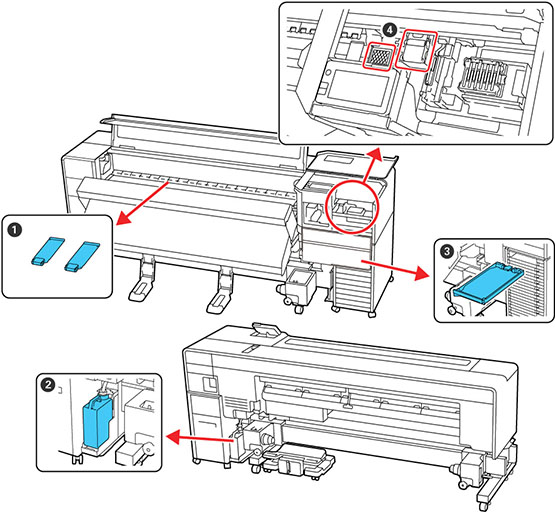
| Number | Part to replace | Frequency |
|---|---|---|
| 1 | Media edge guides | When the guides are deformed or damaged |
| 2 | Waste ink bottle | When a replacement message is displayed on the LCD screen |
| 3 | Ink pack | When you see a message on the LCD screen to replace the ink supply unit |
| 4 | Head cleaning set | When a replacement message is displayed on the LCD screen |
Other Maintenance Schedules