|

Reference Guide
|
|
How To / For EPSON STYLUS PHOTO RX500/600 and EPSON STYLUS CX4600/6400/6600 Users
For Macintosh
 Configuring the network interface
Setting up the device
Scanning via a wireless network
Configuring the network interface
Configure the network interface for use on the TCP/IP network, and install the drivers for the all-in-one and the utility on your computer.
Make sure the all-in-one is set up and the software for the all-in-one is installed on your computer before taking the steps below. See the manual shipped with the all-in-one for detailed instructions.
 |
Note:
|
 | -
This section explains the instructions using Mac OS X. The instructions are almost the same for Mac OS 9.
|
|
| -
It is a good idea to write down the SSID and WEP Key or WPA Personal password before taking the steps below.
|
|
 |
Insert the Software CD-ROM in the CD-ROM drive.
|
 |
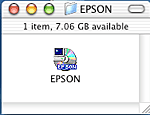
Double-click the EPSON CD-ROM icon.
|
 |
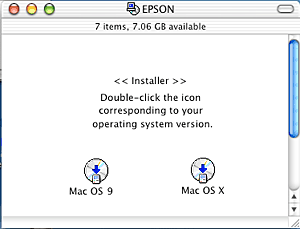
Double-click the appropriate OS icon in the EPSON folder.
|
 |
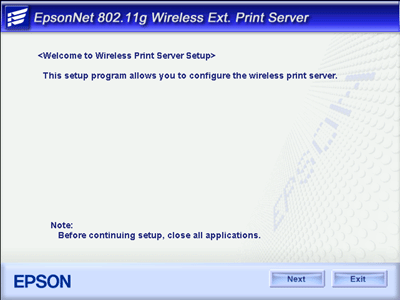
From the Welcome screen, click Next.
|
 |
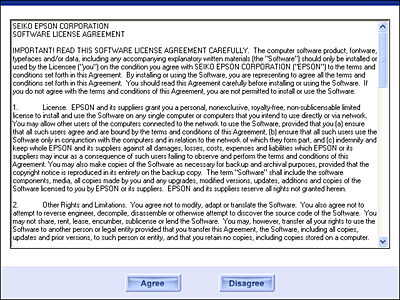
Read the license agreement, and then click Agree.
|
 |
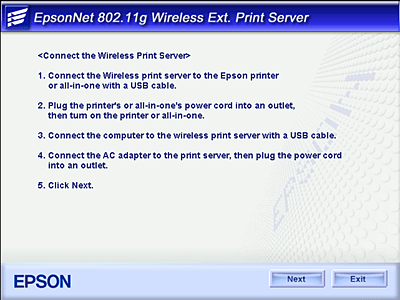
Select Connect the Wireless Print Server.
|

 |
Follow the on-screen instructions to install the USB driver.
|
 |
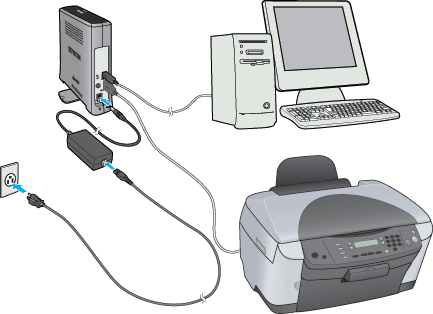
Connect the network interface and the all-in-one with a USB cable. Finally, turn on the all-in-one.
|
| |
Note:
|
| | |
Be sure to use the USB cable that comes with the network interface. If the all-in-one has a built-in USB cable, use it to connect to the network interface.
|
|

 |
Connect the square connector on the USB cable to the USB upstream connector on the network interface, and then connect the other end to the USB port on the computer.
|

 |
Connect the power cord to the AC adapter, and then plug the AC adapter into the network interface's DC-IN connector. Finally, plug the power cord into a properly grounded wall outlet.
|
 |
Click Next.
|
 |
Select the device model name.
|

 |
Click Install.
|
 |
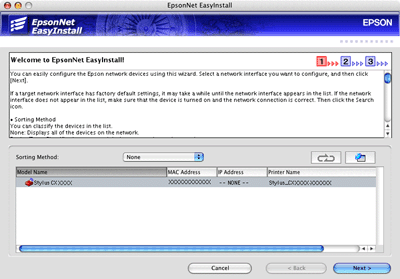
EpsonNet EasyInstall starts. Select the device and then click Next.
|
 |
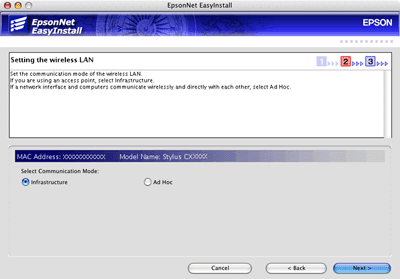
Select Infrastructure or Ad Hoc, and then click Next.
|
 |
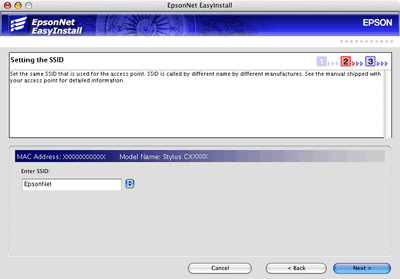
Enter or select the SSID of the access point or wireless LAN (up to 32 characters), and then click Next.
|
 |
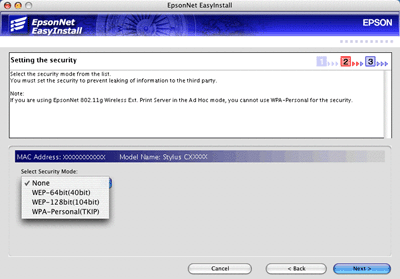
Select the security mode, and then click Next.
|
 |
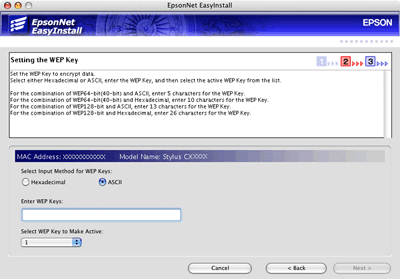
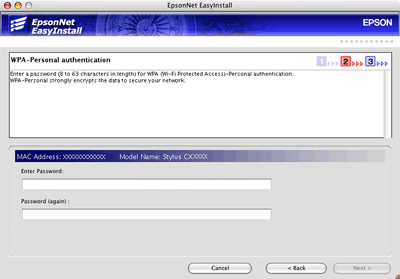
Enter the WEP Key or the WPA-Personal password, if necessary. Click Next.
|
For WEP security:
For WPA security:
 |
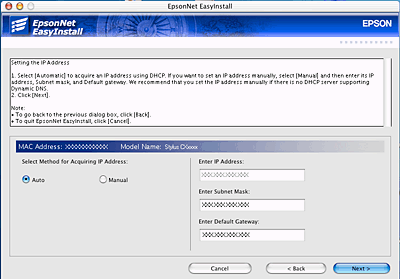
Select a method for specifying the IP address. If you select Auto, DHCP becomes available and assigns an IP address automatically. If you want to set the IP address manually, select Manual and enter the IP address, subnet mask, and default gateway. Click Next.
|
 |
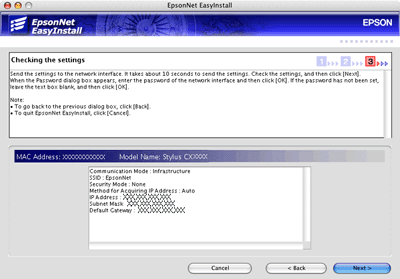
Check the settings you have made, and then click Next.
|
 |
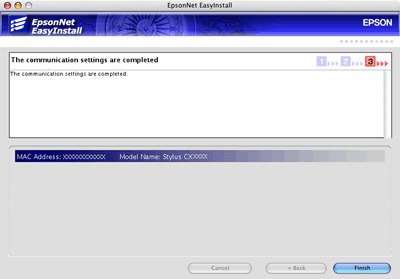
Click Finish to exit EpsonNet EasyInstall.
|
 |
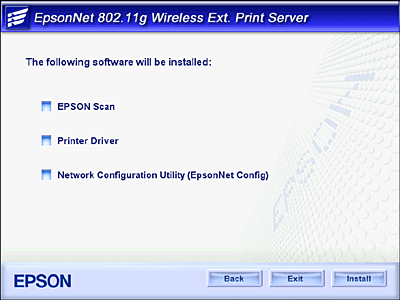
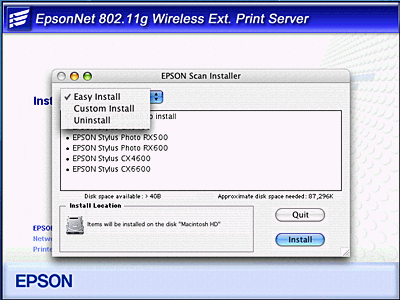
EPSON Scan Installer starts. Select Custom Install from the pull-down menu.
|
 |
Select the model of the all-in-one from the list, and then click Install.
|

 |
Follow the on-screen instructions to install the printer driver and utilities.
|
 |
Restart your computer.
|
 |
Pull out the USB cable from your computer and the network interface.
|


[Top]
Setting up the device
Mac OS X
|
|
Open the Applications folder.
|
|
|
Open the Utilities folder.
|
|
|
Open Print Center (for Mac OS X 10.2 or below) or Printer Setup Utility (for Mac OS X 10.3), and then click Add.
|
|
|
Select Rendezvous from the drop-down list.
|
|
|
Select the device model from the list.
|
|
|
Click Add.
|
Mac OS 9
|
|
Double-click the Macintosh HD icon. In the Applications folder, double-click the EpsonNet folder, and then double-click the EpsonNet Config folder. Finally, double-click the EpsonNet Config icon.
|
|
|
Select the device and then click the Configuration button.
|
|
|
Click Basic under AppleTalk. Make sure the Use AppleTalk check box is selected, and then make the necessary settings.
|
|
|
Click the Send button to send the settings to the network interface.
|
|
|
Open Chooser from the Apple menu.
|
|
|
Click the printer icon.
|
|
|
Select the zone containing the printer.
|
|
|
Select the printer name from the list.
|
|
|
Make sure AppleTalk is active.
|
|
|
Close Chooser.
|
Now you can use the device on the wireless network.
[Top]
Scanning via a wireless network
You can scan images via a wireless network. For details on the scanning function, see the documentation shipped with your device or the online help for EPSON Scan.
Making settings for EPSON Scan
|
|
Mac OS X
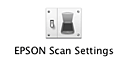
Double-click the Macintosh HD icon. In the Applications folder, double-click the Utilities folder. Then double-click the EPSON Scan Settings icon.
|
Mac OS 9
Click the Apple menu, point to Control Panels, and then select EPSON Scan Settings.
|
|
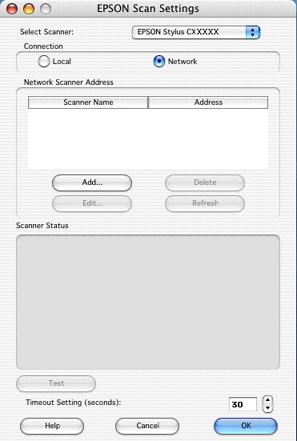
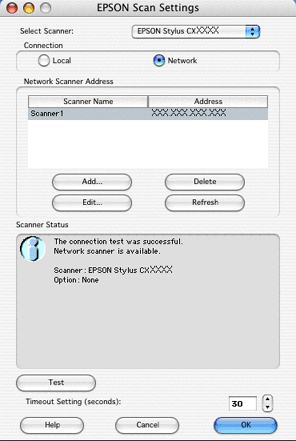
Select the model of your device from the Select Scanner drop-down list.
|
|
|
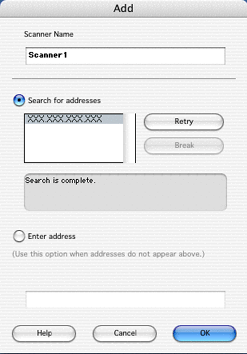
Select the Network radio button, and then click the Add button.
|
|
|
Select the IP address, and then click OK.
|
|
|
Click the Test button. Make sure the device in the Scanner Status text box is available for use on the network.
|
| |
Note:
|
| | |
If the network connection fails, see EPSON Scan Troubleshooting Assistant.
|
|
|
|
Click OK.
|
Starting EPSON Scan
Mac OS X
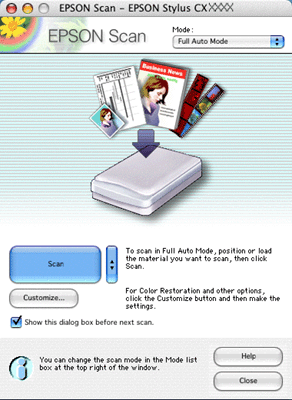
Double-click the Macintosh HD icon. In the Applications folder, double-click the EPSON Scan icon. The EPSON Scan screen appears.
Mac OS 9
From the Apple menu, select EPSON Scan. The EPSON Scan screen appears.
|
Note for Mac OS X and 9:
|
| -
You cannot start Smart Panel on the computer by pushing the button on the LCD panel of the all-in-one via a wireless network.
|
|
Getting information through the online help
EPSON Scan has an online help that provides you with instructions on scanning and making driver settings.
Click Help in any of the dialog boxes in EPSON Scan.
[Top]
| Version 1.00E, Copyright © 2003, SEIKO EPSON CORPORATION |


