|

Reference Guide
|
|
How To / For EPSON STYLUS PHOTO RX500/600 and EPSON STYLUS CX4600/6400/6600 Users
For Windows
 Configuring the network interface
Scanning via a wireless network
Using the network storage
Configuring the network interface
Configure the network interface for use on the TCP/IP network, and install the drivers and the utility for the all-in-one on your computer.
Make sure the all-in-one is set up and the software for the all-in-one is installed on your computer before taking the steps below. See the manual shipped with the all-in-one for detailed instructions.
 |
Note:
|
 | -
If EpsonNet WinAssist is installed on your computer, uninstall it before following the steps below.
|
|
| -
It is a good idea to write down the SSID and WEP Key or WPA Personal password before taking the steps below.
|
|
| -
Windows Server 2003 does not support this function.
|
|
 |
Insert the Software CD-ROM in the CD-ROM drive.
|
If the Installer dialog box does not appear automatically, double-click EPSETUP.EXE on the CD-ROM.
 |
From the Welcome screen, click Next.
|

 |
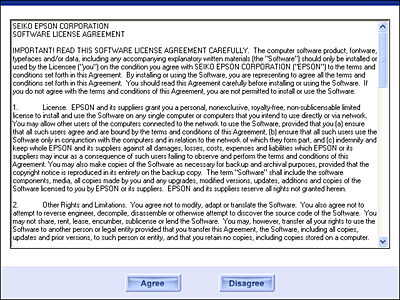
Read the license agreement, and then click Agree.
|
 |
Select Connect the Wireless Print Server.
|

 |
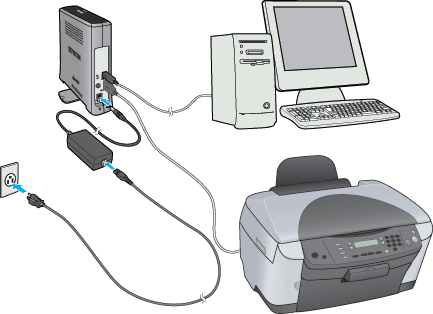
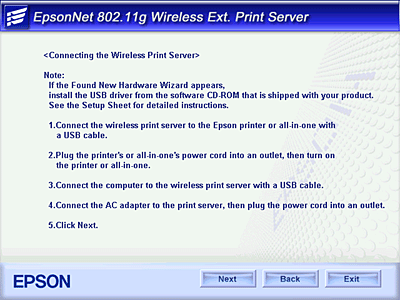
Connect the network interface and the all-in-one with a USB cable. Finally, turn on the all-in-one.
|
| |
Note:
|
| | |
Be sure to use the USB cable that comes with the network interface. If the all-in-one has a built-in USB cable, use it to connect to the network interface.
|
|

 |
Connect the square connector on the USB cable to the USB upstream connector on the network interface, and then connect the other end to the USB port on the computer.
|

 |
Connect the power cord to the AC adapter, and then plug the AC adapter into the network interface's DC-IN connector. Finally, plug the power cord into a properly grounded wall outlet.
|
 |
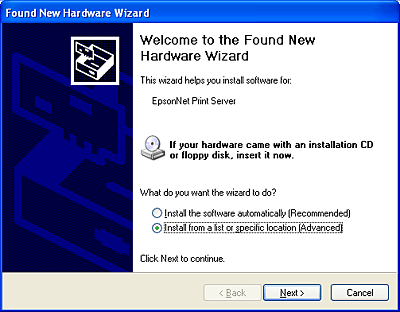
The "Found New Hardware Wizard" appears to prompt you to install the USB driver. Select the Install from a list or specific location radio button and then click Next.
|
| |
Note for Windows XP Service Pack 2 Users:
|
| | |
If the following screen appears, select the No, not this time radio button, and then click Next.
|
|

| |
Note:
|
| | |
These screens may be different depending on the operating system.
|
|
 |
Select the Search for the best driver in these locations radio button and select the Search removable media check box, and then click Next.
|

 |
When the operation is completed, click Finish.
|

 |
Click Next.
|
 |
Select the device model name.
|

 |
Click Install.
|

| |
Note for Windows XP Service Pack 2 users:
|
| | |
If the following screen appears, click the Unblock button; otherwise the device is not listed on the screen of EpsonNet EasyInstall.
|
|

 |
EpsonNet EasyInstall starts. Select the device and then click Next.
|
| |
Note:
|
| | |
If "Printer" appears for the model name, this indicates the all-in-one is not connected to the network interface. Connect the all-in-one and the network interface with a USB cable, and then turn on the all-in-one; otherwise, you cannot install the driver as described in the following steps.
|
|

 |
Select Infrastructure or Ad Hoc, and then click Next.
|

 |
Enter or select the SSID of the access point or wireless LAN (up to 32 characters), and then click Next.
|

 |
Select the security mode, and then click Next.
|

 |
Enter the WEP Key or the WPA-Personal password, if necessary. Click Next.
|
For WEP security:

For WPA security:

 |
Select a method for specifying the IP address. If you select Automatic, DHCP becomes available and assigns an IP address automatically. If you want to set the IP address manually, select Manual and enter the IP address, subnet mask, and default gateway. Click Next.
|

 |
Check the settings you have made, and then click Next.
|

 |
Select the device where you have just set the IP address, and then click Next to install the drivers and the utility.
|

 |
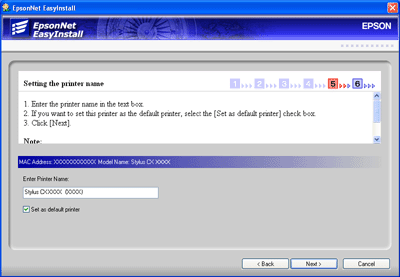
Enter the printer name. If you want to set the printer as the default printer, select the Set as default printer check box. Click Next.
|
| |
Note for Windows XP Service Pack 2 users:
|
| | |
If the following screen appears, click the Unblock button.
|
|

 |
Select Yes to print a test page; otherwise, select No. Click Next.
|

 |
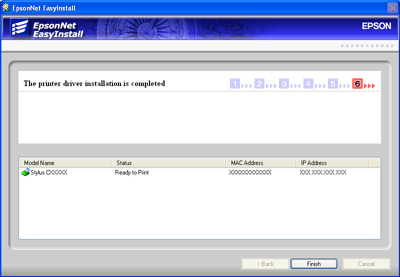
Click Finish to complete the installation.
|
 |
Pull out the USB cable from your computer and the network interface.
|

Now you can use the device on the wireless network.

[Top]
Scanning via a wireless network
You can scan images via a wireless network. For details on the scanning function, see the documentation shipped with your device or the online help for EPSON Scan.
|
Note:
|
| |
Windows Server 2003 does not support this function.
|
|
Starting EPSON Scan
Click Start, point to All Programs (for Windows XP users) or Programs (for Windows Me/98/2000 users) and EPSON Scan, and then select EPSON Scan. The EPSON Scan screen appears.

| |
Note:
|
| | -
You cannot start Smart Panel on the computer by pushing the button on the LCD panel of the all-in-one via a wireless network.
|
|
Getting information through the online help
EPSON Scan has an online help that provides you with instructions on scanning and making driver settings.
Click Help in any of the dialog boxes in EPSON Scan.

Making settings for EPSON Scan
|
|
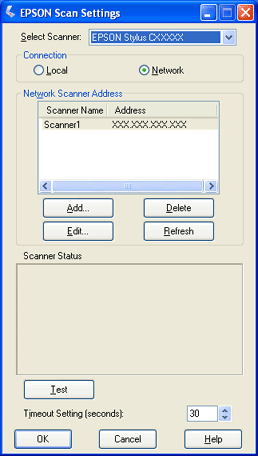
Click Start, point to All Programs (for Windows XP users) or Programs (for Windows Me/98/2000 users) and EPSON Scan, and then select EPSON Scan Settings. The EPSON Scan Settings dialog box appears.
|

|
|
Select the model name of your device from the Select Scanner drop-down list.
|
|
|
Select the Network radio button.
|
|
|
Click the Test button. Make sure the device in the Scanner Status text box is available for use on the network.
|
| |
Note:
|
| | |
If the network connection fails, see EPSON Scan Troubleshooting Assistant.
|
|

|
|
Click OK.
|
[Top]
Using the network storage
You can display or read data on the memory card via a wireless network.
|
Note:
|
| -
You can use this function on Windows XP/2000 only.
|
|
| -
You can only display or read data on the memory card.
|
|
| -
When you access the Network Storage and delete data on the memory card, the data disappears. However, the data is not actually deleted so the data appears again when you select Refresh from the View menu.
|
|
Accessing the network storage
The network drive you mapped appears in My Computer. To display or read the file, double-click the network drive icon.
|
Note:
|
Disconnecting the network storage
To disconnect the network drive of the network storage, right-click the network drive icon, and then select Disconnect.
Changing the network storage information
You can change the host name or the storage name you specified in the Run dialog box by using EpsonNet Config. For more detailed information, see EpsonNet Config Reference Guide or About EpsonNet Config.
[Top]
| Version 1.00E, Copyright © 2003, SEIKO EPSON CORPORATION |

