|

User's Guide
|
|
Installing Components and Setting Up the Network Interface / How to Set UP the Network Interface
Configuring the network interface for Macintosh
 Setting up the printer
Follow the steps below to connect the network interface to the network.
 |
Note:
|
 | |
This section explains the instructions for Mac OS X. The instructions are almost the same for Mac OS 9.
|
|
 |
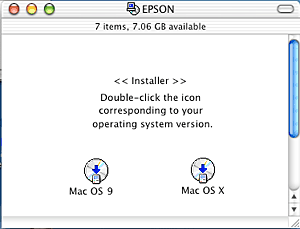
Insert the Software CD-ROM in the CD-ROM drive.
|
If the Installer dialog box does not appear automatically, double-click the EPSON CD-ROM icon on the desktop.
 |
Double-click the appropriate OS icon in the EPSON folder.
|
 |
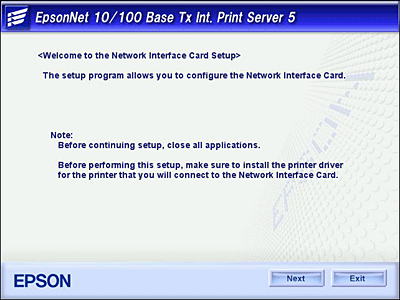
From the Welcome screen, click Next.
|
 |
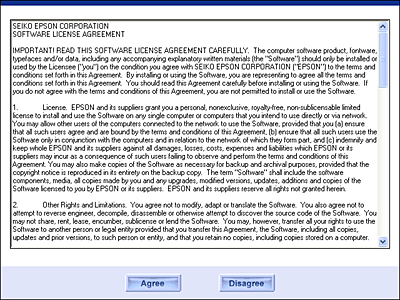
Read the license agreement, and then click Agree.
|
 |
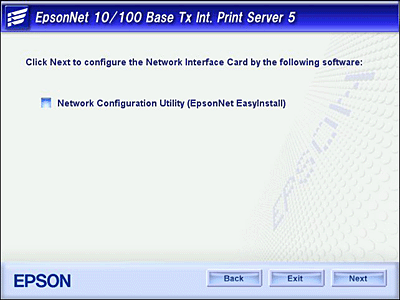
Select Connect the Network Interface Card.
|

 |
Click Next.
|
 |
Select the target device on which the network interface is installed, and then click Next.
|

 |
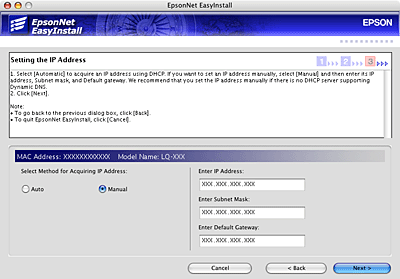
Select Auto or Manual to assign the IP address to the network interface, and then click Next. When you select Manual, you must enter the IP address, subnet mask, and default gateway.
|
 |
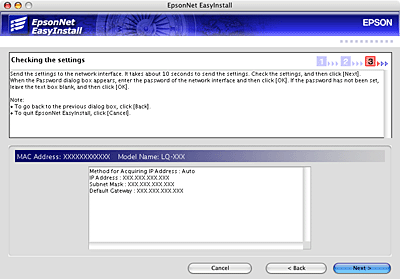
Confirm the settings you selected from the previous dialog box, and then click Next.
|
 |
Click Finish to complete the configuration of the network interface.
|

Setting up the printer
The printer driver must be installed on the computer before you can set up the printer. See the device's manual for information on installing the printer driver.
Mac OS X
|
|
Open the Applications folder.
|
|
|
Open the Utilities folder.
|
|
|
Open Print Center (for Mac OS X 10.2 or below) or Printer Setup Utility (for Mac OS X 10.3), and then click Add.
|
|
|
Select Rendezvous from the drop-down list.
|
|
|
Select the printer model from the list.
|
|
|
Click Add.
|
Mac OS 9
|
|
Open Chooser from the Apple menu.
|
|
|
Click the printer icon.
|
|
|
Select the zone containing the printer.
|
|
|
Select the printer name from the list.
|
|
|
Make sure AppleTalk is active.
|
|
|
Close Chooser.
|
Now you can use the device on the network.

[Top]
| Version 1.00E, Copyright © 2003, SEIKO EPSON CORPORATION |

