![]()
Reference Guide
| Index | Help | Safety | ||||||||
| Contents | Glossary |
|
||||||||
|
|
|
|||||||||||||||||||||||||||||||||
Scanning / How to
Adjusting settings in Home Mode
Setting Options
Job Occasion
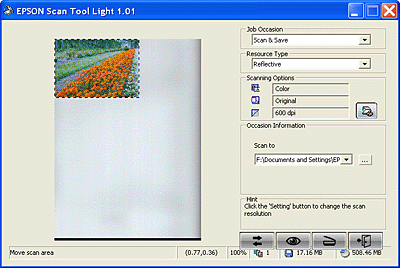
Click the  Settings button to
display the Setting dialog box.
There are six items in this dialog box: Image Type, Output Size, Resolution, Brightness, Contrast and Saturation.

| Note: |
|
|
Image Type |
Allows you to select the color mode you want to apply to the scanned images. The Default color mode is Color. Other options include Gray, Gray 16 bits, BW and Color 48 bits. |
|
Output Size |
Sets the size at which you want to print your scanned image. |
|
Resolution |
Sets the scanning resolution.The default resolution is 600 dpi. Other available resolutions include: 75, 100, 150, 200, 300, 600, 1200, 2400, 4800, 9600 and 19200. |
|
Brightness |
Adjusts the brightness of scanned images. You can increase or decrease the brightness of scanned images from -100 to 100. |
|
Contrast |
Lets you to adjust the contrast of scanned images. You can increase or decrease the contrast of scanned images from -100 to 100. |
|
Saturation |
Adjusts the color saturation of scanned images. You can increase or decrease the color saturation of scanned images from 0 to 100. |
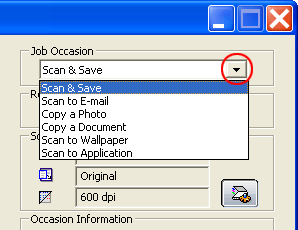
 | Click the button indicated below and a list of job occasions will appear on the screen. Choose Scan & Save. |
 |
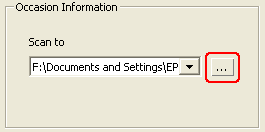
In the Occasion Information section, click the button indicated below to choose the path where you want to store your scanned images. The default path is C:\My Documents\My Pictures\Scan Pictures. |
 |
Next, click the  Scan button
on the screen. The CX1500 begins scanning the original. When finished, the
scanned image file is saved to the default file folder or to the path you
selected. Scan button
on the screen. The CX1500 begins scanning the original. When finished, the
scanned image file is saved to the default file folder or to the path you
selected. |
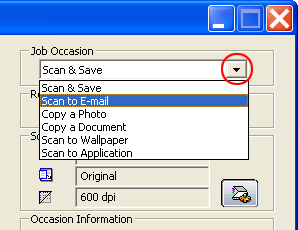
 | Click the button indicated below and a list of job occasions will appear on the screen. Choose Scan to E-mail. |
 |
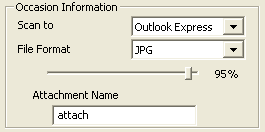
In the Occasion Information section, enter your email settings. In the Scan to drop-down list, choose either Microsoft Outlook or Outlook Express. In the File Format drop-down list, you can choose to scan your image as a JPG file or BMP file. In the Attachment Name text box, enter a name for the attached file. |
 |
Next, click the  Scan button on the screen. EPSON Scan Tool Light will scan the original and transfer the scanned image to a new e-mail as an attachment. Scan button on the screen. EPSON Scan Tool Light will scan the original and transfer the scanned image to a new e-mail as an attachment.
|
 |
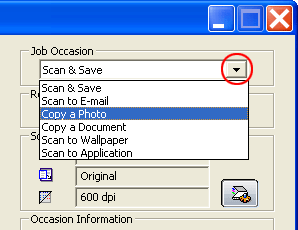
Click the button indicated below and a list of job occasions appears on the screen. Choose Copy a Photo. |
 |
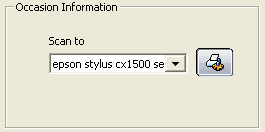
In the Occasion Information section, select your printer. |
 |
Next, click the  Scan button on the screen. EPSON Scan Tool Light begins scanning the original. When finished, the image will be printed by the printer you selected. Scan button on the screen. EPSON Scan Tool Light begins scanning the original. When finished, the image will be printed by the printer you selected.
|
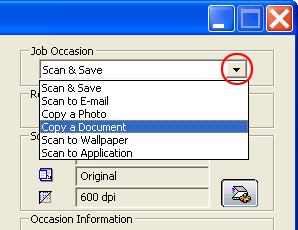
 | Click the button indicated below and a list of job occasions will appear on the screen. Choose Copy a Document. |
 |
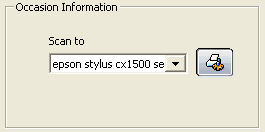
In the Occasion Information section, select a printer to print your scanned document. |
 |
Next, click the  Scan button
on the screen. EPSON Scan Tool Light begins scanning the original. When
finished, the scanned document will be printed by the printer you selected. Scan button
on the screen. EPSON Scan Tool Light begins scanning the original. When
finished, the scanned document will be printed by the printer you selected.
|
This function enables you to scan images and replace your current Windows wallpaper with the images you have scanned.
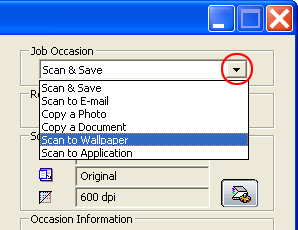
 | Click the button indicated below and a list of job occasions will appear on the screen. Choose Scan to Wallpaper. |
 |
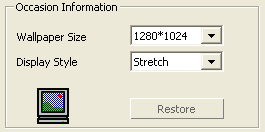
In the Occasion Information section, make any changes to your wallpaper setup. For the “Wallpaper Size” item, you can choose to change the size of your wallpaper. For “Display Style”, you can change the settings for the display. There are three options for you to choose from: Stretch, Center and Tile. |
 |
Next, click the  Scan button on the screen. EPSON Scan Tool Light will begin scanning the original and when finished, your wallpaper will be replaced with the image you have scanned. Scan button on the screen. EPSON Scan Tool Light will begin scanning the original and when finished, your wallpaper will be replaced with the image you have scanned.
|
If you have installed application programs that EPSON Scan Tool Light can recognize and work with, you can use this function to scan and transfer the scanned images to those application programs.
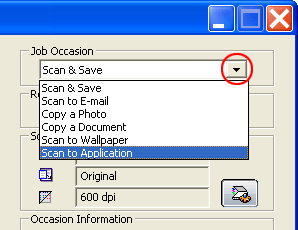
 | Click the button indicated below and a list of job occasions will appear on the screen. Choose Scan to Application. |
 |
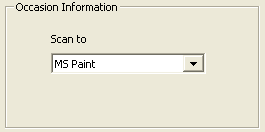
In the Occasion Information section, choose the application program to which you want to transfer the scanned images. |
 |
Click the  Scan button
on the screen. EPSON Scan Tool Light scans the image, which opens in the
application you chose. Scan button
on the screen. EPSON Scan Tool Light scans the image, which opens in the
application you chose. |
| Version 1.00E, Copyright © 2003, SEIKO EPSON CORPORATION |