- Place your original photo, film, or slide on the scanner. See Placing Originals for Scanning for instructions.
- Start EPSON Scan. See Starting EPSON Scan for instructions.
- When the EPSON Scan window appears, do one of the following, depending on the currently selected scan mode:
- Home or Professional Mode: go to step 4.
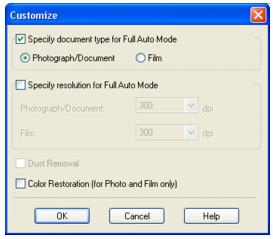
- Full Auto Mode: click the Customize button, then click the Specify document type for Full Auto Mode checkbox and select Photograph/Document or Film. Click the Color Restoration checkbox and click OK. Continue with step 9.
- Select the basic settings for the type of original(s) you are scanning, then select the destination setting for the way you will use your image(s). See Selecting Basic Settings for instructions.
- Click the Preview button to preview your image(s), then select your scan area. See Previewing and Adjusting the Scan Area for instructions.
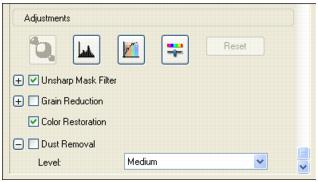
- Do one of the following to select the Color Restoration option:
- Make any other necessary image adjustments. See Adjusting the Color and Other Image Settings for instructions.
- Size your image as necessary. See Selecting the Scan Size for instructions.
- Click the Scan button to scan and restore the color in your image(s).
Note:
For details on using Full Auto Mode, see Using Full Auto Mode.
To change the scan mode, see Changing the Scan Mode.
What happens next depends on how you started EPSON Scan. See Finishing the Scan for details.