![]()
Reference Guide
| Index | Search | Glossary | ||||||||
| Contents | Help |
|
||||||||
|
|
|
|||||||||||||||||||||||||||||||||
Printing with Mac OS X
Printer
Presets
Copies & Pages
Layout
Output Options
Print Settings
Printer Color Management
Paper Configuration
Roll Paper Option
Summary
Saving your settings in the Print dialog box
Using your saved settings in the Print dialog box
Preview
You can make appropriate Printer and Presets settings that you want to use for printing.
| Note: |
|

Select a printer with the desired paper and margins.
|
Printer |
Description |
|
SPro 4000: Borderless (Auto Expand) |
Select this setting when printing on a cut sheet. Prints your data with no margins enlarging the size of print data automatically. |
|
SPro 4000: Borderless (Retain Size) |
Select this setting when printing on a cut sheet. Prints your data with no margins keeping the ratio of your print data. |
|
SPro 4000: Maximum |
Select this setting when printing on a cut sheet. Prints your data with an expanded bottom margin. |
|
SPro 4000: Roll Paper |
Select this setting when printing on a roll paper. Prints your data with using the standard printable area. |
|
SPro 4000: Roll Paper - Banner |
Select this setting when printing on a banner. |
|
SPro 4000: Roll Paper - Borderless (Auto Expand) |
Select this setting when printing on roll paper. Prints your data with no margins enlarging the size of print data automatically. |
|
SPro 4000: Roll Paper - Borderless (Retain Size) |
Select this setting when printing on roll paper. Prints your data with no margins keeping the ratio of your print data. |
|
SPro 4000: Roll Paper - Borderless Banner |
Select this setting when printing on banner. Prints your data with no margins. |
|
SPro 4000: Standard |
Select this setting when printing on a cut sheet. Prints your data using the standard printable area. |
| Note: |
|
You can select Standard or Save as.
Prints with the current settings.
Prints with the custom saved settings.
You can make the appropriate Copies, Collated, Pages settings that you want to use for printing.

To make the Copies setting, enter the number of copies that you want to print in the Copies text box.
To make print order setting, select Collated to print one complete document set at a time when printing multiple copies.
To make the Pages setting, select either All or From and to. If you select From and to, enter the first page of the appropriate range of pages in the From text box and the last page in the to text box.
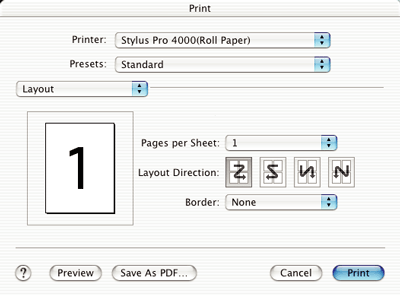
You can make the appropriate Pages per Sheet, Layout Direction, and Border settings that you want to use for printing.
| Note: |
|
You can print multiple pages of your data on a single piece of paper. You can select from 1, 2, 4, 6, 9, or 16.
You can specify the order in which the pages will be printed on the sheet of paper.
You can print a border around the pages printed on each sheet. You can select from None, Single hairline, Single thin line, Double hairline, or Double thin line.
You can print your data as a file if you click the Save as file check box, and select its format from the Format pull down menu.
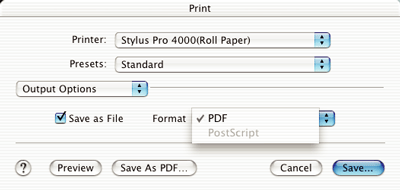
If you want to print your data on paper, clear the Save as file check box.
| Note: |
|
You can make Media Type, Ink, and Mode settings.
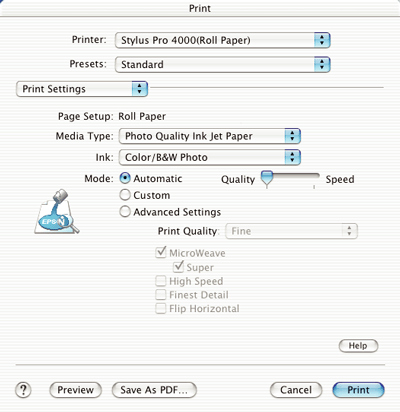
Page Setup shows the printer driver that is selected.
If one of the choices listed below is selected as the Format for in the Page Setup dialog box and as the Printer setting in the Print dialog box, a pop-up menu appears. Select Paper Tray if you are using the paper tray or select Manual Feed if you are using the front or rear manual feed slot.
Spro 4000: Borderless (Auto Expand)
Spro 4000: Borderless (Retain Size)
Spro 4000: Maximum
Spro 4000: Standard
If the pop-up menu does not appear, download the latest printer driver from Epson customer support web site. See Contacting Customer Support.
The Media Type setting determines what other settings are available, so you should always make this setting first.
Select the media that matches the paper loaded in the printer from the Media Type. Find your paper in the list, and select a corresponding Media Type setting. For some kinds of paper, you have several Media Type settings to choose from.
| Note: |
|
|
|
|
|
Media Type setting |
Epson Special Media Name/Description |
|
Singleweight Matte Paper |
EPSON Singleweight Matte Paper |
|
Enhanced Matte Paper |
EPSON Enhanced Matte Paper |
|
Premium Glossy Photo Paper |
EPOSN Premium Glossy Photo Paper |
|
Premium Semigloss Photo Paper |
EPSON Premium Semigloss Photo Paper |
|
Premium Luster Photo Paper |
EPSON Premium Luster Photo Paper |
|
Premium Luster Photo Paper (250) (Roll) |
EPSON Premium Luster Photo Paper (250) |
|
Premium Glossy Photo Paper (250) |
EPSON Premium Glossy Photo Paper (250) |
|
Premium Semigloss Photo Paper (250) |
EPSON Semigloss Photo Paper (250) |
|
Premium Semimatte Photo Paper (250) |
EPSON Semimatte Photo Paper (250) |
|
Smooth Fine Art Paper |
EPSON Smooth Fine Art Paper |
|
Textured Fine Art Paper |
EPSON Textured Fine Art Paper |
|
Proofing Paper Semimatte |
EPSON Proofing Paper Semimatte |
|
Plain Paper |
- |
|
Plain Paper (Line drawing) |
- |
|
Tracing Paper |
- |
You can select ink mode. Select Color/B&W Photo to print color or monotone photos, or Black to print a draft or black text only.
| Note: |
|
You can select Automatic, Custom, or Advanced settings.
Automatic is the quickest and easiest way to start printing. When Automatic is selected, the printer driver takes care of all detailed settings based on the current Media Type and Ink settings.

| Note: |
|
Custom lets you make a wide range of changes with a single click of the mouse. In the Custom Settings pull-down menu, you will find ready-made settings provided by Epson. They are designed to match particular kinds of printouts, such as graphs and charts for a presentation.

The Custom Settings pull-down menu includes the following ready-made settings:
|
Text/Graph |
Good for printing presentation documents such as graphs and charts. |
|
ColorSync |
Automatically adjusts printout colors to match colors on your screen. |
|
Advanced Photo Advanced Photo 2880 dpi |
Good for printing scanned photos and digitally-captured images in high quality. Helps prevent the misprinting of ink dots that may occur due to the movement of the print heads and paper. |
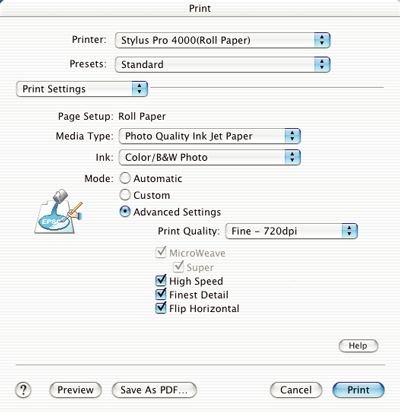
Advanced Setting gives you complete control over your printing environment. Use these settings to experiment with new printing ideas, or to fine-tune a range of print settings to meet your individual needs. Once you are satisfied with your new settings, you can give them a name and add them to the Custom Settings list.
|
Print Quality |
Select the printing quality that you want to use for printing. |
|
MicroWeave |
Gives you slightly more detail, but print times will be longer. |
|
High Speed |
Activates bidirectional printing so your printer prints both left-to-right and right-to-left. This setting speeds up printing, but decreases print quality. |
|
Flip Horizontal |
Prints your data as it would appear in a mirror. Text and graphics appear reversed. |
This option gives you control over the color matching and adjustment methods provided with the printer driver.
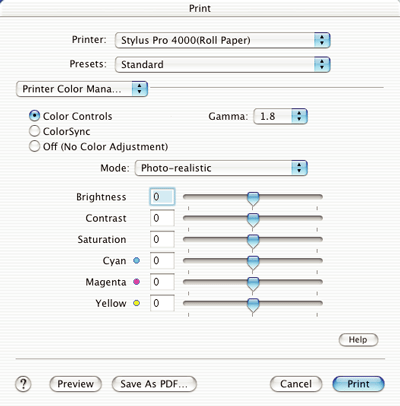
Use these settings to experiment with new printing ideas or to fine-tune a range of printer settings to meet your individual needs. Once you are satisfied with your new settings, you can add them to the Custom Setting list in the Print dialog box.
Select this setting to use the color matching and adjustment methods provided with the printer.

Controls image contrast by modifying the midtones and mid-level grays
|
Photo -realistic |
Increases the contrast in an image. Use this setting for color photographs. |
|
Vivid |
Intensifies the colors and lightens the midtones and highlights of an image. Use this setting for presentation graphics, such as charts and graphs. |
The color enhancement slide bars adjust the indicated options in a range of -25% to +25%.
Drag the slide bar to the right or left with your mouse to adjust the settings. You can also type a value from -25% to +25% in the boxes next to the slide bars.
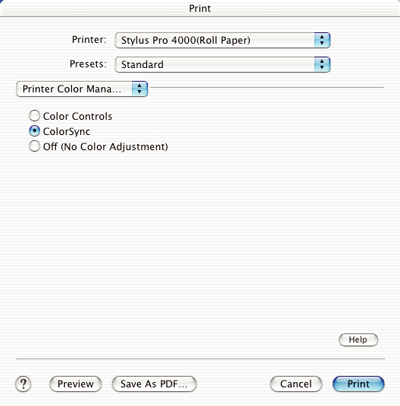
This setting automatically adjusts printout colors to match colors on your screen. Select this setting when printing scanned photographs or computer graphics.
| Note: |
|
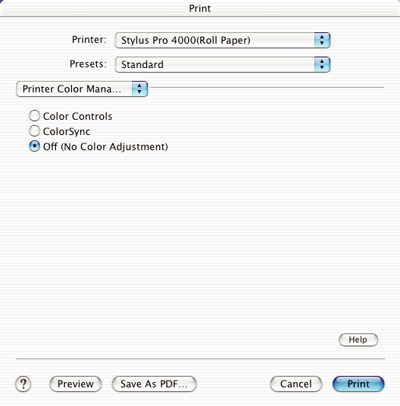
This setting is generally not recommended, because it does not allow the printer driver to enhance or adjust the color in any way. Only use this setting when you create a new color profile or if the other Mode settings do not produce satisfactory results.
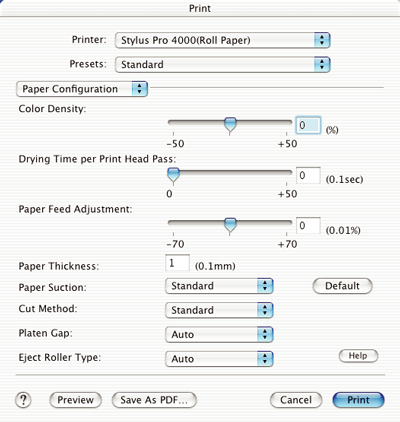
The following settings in Paper Configuration let you make the detailed paper settings. If you are using non-Epson special media, make these settings as needed.
|
Mode |
Description |
|
Color Density |
Adjusts the strength of Color Density. Use a value in the range of -50% to +50%. Drag the slider with your mouse to the right direction (+) to deepen the color of your printout or left direction (-) to lighten its color. You can also type a number (-50 to +50) in the box next to the slider. Use this function when you print on paper other than Epson special media. Set the scroll bar to the 0 position when you print on Epson special media.
Note: |
|
Drying Time per Print Head Pass |
Adds a waiting time when the print head reaches the end of every pass. Set this value using the slider or text box. To improve the print quality by slow ink absorption on the media, set the value larger. The drying time per print head pass can be set in 0.1 second increments, from 0 to 5 seconds.
Note: |
|
Paper Feed Adjustment |
Controls the paper feeding value in 0.01% increments. If the paper feeding value is too large, white horizontal micro banding may appear. If the paper feeding value is too small, dark horizontal micro banding may appear. |
|
Paper Suction |
Decreasing the air suction at the platen is useful to avoid wrinkling or waving of thin or saturated media, or eliminating vertical banding. The relationship of the parameter and suction power is as follows.
Standard : 100 % |
|
Paper Thickness |
This value automatically appears according to the media for the Media Type setting. If you use non-Epson media, modifying this value for your media is recommended. Refer to the paper specifications or print "Thickness Pattern" to find out the paper thickness. |
|
Cut Method |
Determines the best cutting method according to the paper thickness.
Standard: normal speed and normal cut pressure. |
|
Platen Gap |
Platen Gap is the height from the media loaded into the printer to the print head. By adjusting this parameter, you may produce better print quality. This is set automatically according to the Paper Thickness specified.
Note: |
|
Eject Roller Type |
Select one that best fits your media.
Auto:
Starwheel-Sheet:
Starwheel-Roll Curled:
No Roller-Roll Normal: |
You can make Auto Cut, Print Page Line, and Save Roll Paper settings.
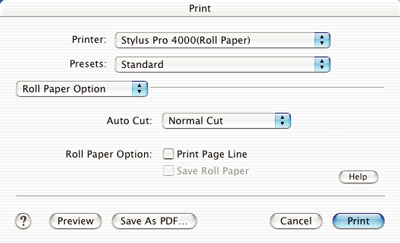
You can select the following cutting methods.
Select this setting if you want to save paper.
If you select this setting, the boundary of a picture and a picture, or boundary of a page and page is cut. However, the cut position may shift slightly.
| Note: |
|

Select this setting to avoid the slight gap that occurs with the Single Cut setting. A margin is created between the pictures, and 1mm along the inside of each picture is cut.
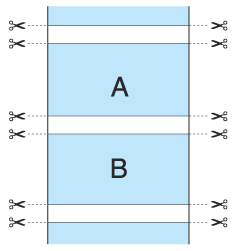
Select this setting to keep margins at the top and bottom of the printed data.
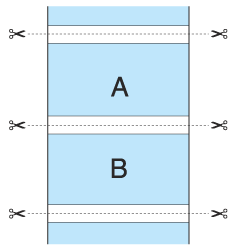
Select this setting to cut the printouts manually. To cut the printouts manually, follow these steps.
 |
Press the Paper Feed  or Paper Feed or Paper Feed  button, and match the cutting position with the scissors mark on the left side of the print head. button, and match the cutting position with the scissors mark on the left side of the print head.
|

 |
Press the Paper Source  button to select Auto Cut On button to select Auto Cut On  . .
|
 |
Press and hold the Paper Source  button for 3 seconds. The paper cutter cuts the printout at the cutting position. button for 3 seconds. The paper cutter cuts the printout at the cutting position.
|
You can specify whether to print a page line on the right side and also below the printed data for manual cutting.
The Print Page Line operation changes according to the Auto Cut setting. Check these settings as necessary by referring the printer's operation.
|
Auto Cut |
Print Page Line |
Printer's Operation |
|
Single Cut |
Selected |
Prints page line on the right side only, and cuts paper automatically after the print job. |
|
Single Cut |
Not selected |
Does not print page line, and cuts paper automatically after the print job. |
|
Off |
Selected |
Prints page lines on the right side and below the printed data, but does not cut paper automatically after the print job. |
|
Off |
Not selected |
Does not print page lines nor cut paper automatically after the print job. |
This setting is effective if you wish to save roll paper because blank portion of the last page or your printed data is not fed through the printer.
You can confirm the current settings in the Print dialog box.
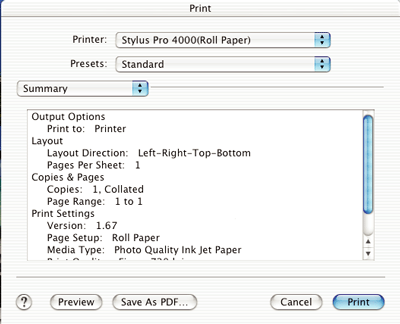
| Note: |
|
To save your settings in the Print dialog box, follow these steps.
 | Select Save as from the Presets. |
 | Enter the name of the custom setting in the Save Preset As. |
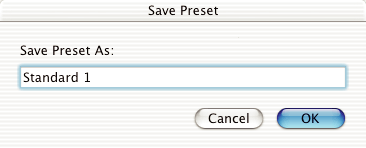
 | Make sure that the name you entered in step 2 is saved in the Presets pull-down menu. |
To use your saved settings, select the name of your custom setting from the Presets pull-down menu.
If you change the Media Type or Ink settings while your customized setting is selected in the Saved Settings list, your saved setting is not affected by the change. To return to your saved setting, simply reselect it in the list.
You can see how your data will look before actually printing it.
| Note: |
|
To preview your data, follow these steps.
 | Make your printer driver settings. |
 | Click Preview in the Print dialog box. The Preview dialog box appears and displays a preview of your data. |
 Previous |
 Next |
| Version 1.00E, Copyright © 2001, SEIKO EPSON CORPORATION |