![]()
Reference Guide
|
|
Index |
|
Search |
|
Safety | |||||
|
|
Contents |
|
Help |
|
||||||
|
|
|
|||||||||||||||||||||||||||||||||
Scanning / How to
For films
Follow the steps below to make settings suitable for scanning films in the Professional Mode.
 | Place your films on the document table. If necessary, see the following section for more information. |
 | Placing Films |
 | Start EPSON Scan and then select the Professional Mode. For details on how to select the scanning mode, see Changing a scanning mode. |
 | The setting window appears. Specify the settings to match your document referring to the illustration and the table below. |

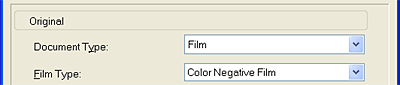
 | Specify the Original settings to match your films. |
|
Document Type |
Film |
|
Film Type |
Select a film type from the Film Type list. |
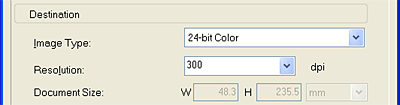
 | Specify the Destination settings to match the resulting image file you desire. |
|
Image Type |
Select a suitable image type from the Image Type list. |
|
Resolution |
Select a suitable resolution from the Resolution list. |
| Note: |
|
|
|
Purpose |
Resolution |
|
Sending E-mail |
96 to 150 dpi |
|
Printing |
300 dpi |
 | Click Preview to preview the images. |
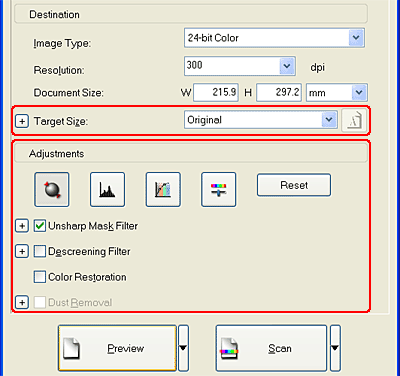
 | Use Target Size to specify the output size of the scanned image. Also, specify the Adjustments settings, if necessary. See Create Beautiful Reproductions for details. (You may need to scroll to the bottom of the screen.) |
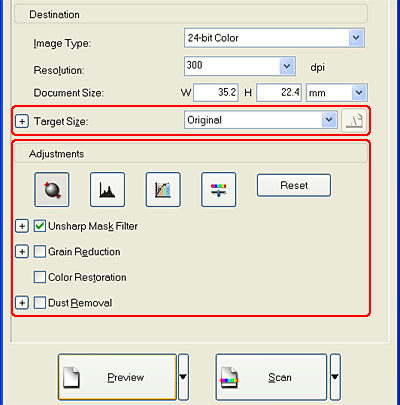
 | Click Scan to start scanning. The scanned image is saved to the specified folder. |
Follow the steps below to make settings suitable for scanning documents and photos (reflective documents) in the Professional Mode.
|
| Place your materials on the document table. If necessary, see the following section for more information. |
| Placing Documents and Photos |
|
| Start EPSON Scan and then select the Professional Mode. For details on how to select a scanning mode, see Changing a scanning mode. |
|
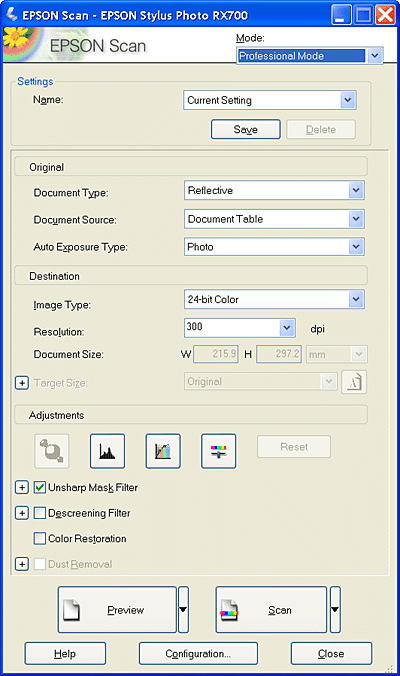
| The setting window appears. Specify the settings to match your document referring to the illustration and the table below. |
|
Original |
Document Type |
Reflective |
|
Document Source |
Document Table |
|
|
Auto Exposure Type |
Select "Document" or "Photo" from the Auto Exposure Type list. |
|
|
Destination |
Image Type |
Select a suitable image type. |
|
Resolution |
Select an appropriate resolution. See Select the suitable resolution. |
|
|
Target Size |
To be set in a later step. |
|
|
Adjustment |
To be set in a later step. |
|
|
| Click Preview to preview the images. |
|
| Use Target Size to specify the output size of the scanned image. Also, specify the Adjustments settings, if necessary. See Create Beautiful Reproductions for details. |
|
| Click Scan to start scanning. |
The scanned image is saved to the specified folder.
When you specify a high resolution, the number of pixels of the data increases and the scanned image becomes fine in texture. However, increasing the resolution causes the data size to increase. Specify a suitable resolution according to the scanning purpose.
The following table indicates the suitable resolution to use according to the scanning purpose.
|
Purpose |
Resolution |
|
Sending E-mail |
96 to 150 dpi |
|
OCR (Optical Character Recognition) |
300 dpi |
|
Printing |
300 dpi |
|
Sending Fax |
200 dpi |
 Previous |
 Next |
| Version NPD1043-00, Copyright © 2005, SEIKO EPSON CORPORATION |