|

User's Guide
|
|
Using the Stylus RIP Professional with Macintosh
Installing the Stylus RIP Professional Software
 Before installing the Stylus RIP Professional
 Mac OS X users
 Mac OS 8.6/9.x users
This section explains the procedures for installing the EPSON Stylus RIP Professional 2.0 on computers running the Macintosh operating system.
 |
Note:
|
Before installing the Stylus RIP Professional
You should determine what kind of installation you need, i.e., standard or custom before installing the Stylus RIP Professional. To install the Stylus RIP Professional on a standalone or print server Macintosh, follow the standard installation instructions under Easy Install. To install the Stylus RIP Professional on a client Macintosh, or if you do not want to print directly from the print server Macintosh, follow the custom installation instructions under Custom Install.

[Top]
Mac OS X users
Easy Install
Use the standard installation method to install the Stylus RIP Professional on a standalone or print server Macintosh.
Follow these steps to perform an Easy Install:
 |
Note:
|
 | |
Turn off all virus protection software before you install the Stylus RIP Professional. To do this, see the documentation that came with your virus protection software or computer.
|
|
 |
Insert the CD-ROM that shipped with EPSON Stylus RIP Professional 2.0 into your CD-ROM drive.
|
 |
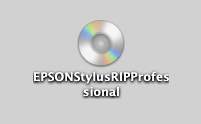
Double-click the CD-ROM icon.
|
 |
Open the OSX_Installer folder, and then double-click the Installer_    icon. icon.
|

 |  |
Note:
|
 |  | |
If the Authenticate window appears, enter your passphrase, and then click OK.
|
|
 |
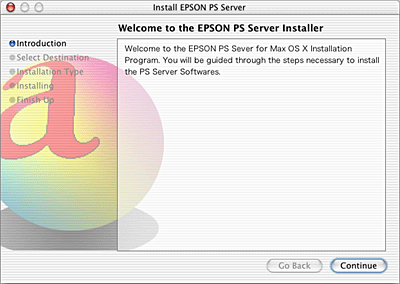
Click Continue.
|
 |
Select the destination disk to install the software, and then click Continue.
|
 |
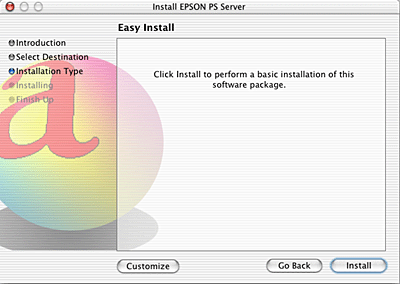
Click Install to perform a basic installation of the software.
|
 |  |
Note:
|
 |  | |
If the software is being reinstalled, Upgrade appears instead of Install.
|
|
 |
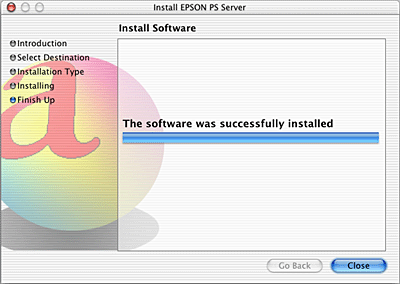
When installation is complete, click Close.
|
Custom Install
Use the custom installation method to install the Stylus RIP Professional on a client computer (a typical workstation connected to the network) or to install the minimum number of files required for the print server. The minimum Stylus RIP Professional print server setup includes only print server software, which means you will not be able to print PostScript documents directly from the host machine that contains your print server.
Follow these steps to perform a Custom Install:
 |
Note:
|
 | |
Turn off all virus protection software before you install the Stylus RIP Professional. To do this, see the documentation that came with your virus protection software or computer.
|
|
 |
Insert the CD-ROM that shipped with EPSON Stylus RIP Professional 2.0 into your CD-ROM drive.
|
 |
Double-click the CD-ROM icon.
|
 |
Open the OSX_Installer folder, and then double-click the Installer_    icon. icon.
|
 |  |
Note:
|
 |  | |
If the Authenticate window appears, enter your passphrase, and then click OK.
|
|
 |
Click Continue.
|
 |
Select the destination disk to install the software, and then click Continue.
|
 |
Click Customize.
|

 |  |
Note:
|
 |  | |
If the software is being reinstalled, Upgrade appears instead of Install.
|
|
 |
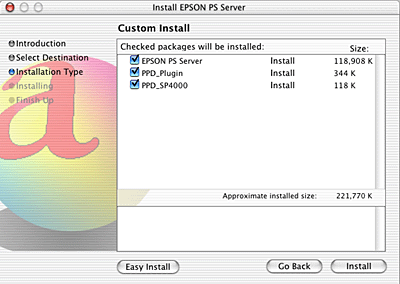
Select the item(s) that you want to install, and then click Install to begin installation.
|
 |  |
Note:
|
 |  | |
If the software is being reinstalled, Upgrade appears instead of Install.
|
|
 |
When installation is complete, click Close.
|

[Top]
Mac OS 8.6/9.x users
Easy Install
Use the standard installation method to install the Stylus RIP Professional on a standalone or print server Macintosh.
Follow these steps to perform an Easy Install:
 |
Note:
|
 | |
Turn off all virus protection software before you install the Stylus RIP Professional. To do this, see the documentation that came with your virus protection software or computer.
|
|
 |
Insert the CD-ROM that shipped with EPSON Stylus RIP Professional 2.0 into your CD-ROM drive. The EPSON Stylus RIP Professional window automatically appears on your screen.
|

 |
Open the OS9_Installer folder, and then double-click the Installer_    icon. The following screen appears. icon. The following screen appears.
|

 |
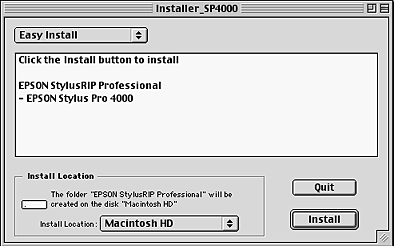
Click Continue. The following dialog box appears.
|
 |
Click Install.
|
 |  |
Note:
|
 |  | |
The installer automatically saves the Stylus RIP Professional files on the root level of your hard disk. If you want to change the location where the files are installed, click the Install Location pop-up menu, and then select Select Folder to specify the location.
|
|
When the installation of Stylus RIP Professional is complete, the Adobe PostScript driver installer automatically starts up.
Click Continue, and then follow the on-screen instructions.
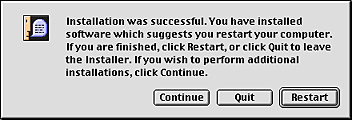
The program installs all the files necessary to run Stylus RIP Professional. When installation is complete, the following dialog box appears:
 |
Click Quit or Restart to complete the installation.
|
Custom Install
Use the custom installation method to install the Stylus RIP Professional on a client computer (a typical workstation connected to the network) or to install the minimum number of files required for the print server. The minimum Stylus RIP Professional print server setup includes only print server software, which means you will not be able to print PostScript documents directly from the host machine that contains your print server.
Follow these steps to perform a Custom Install:
 |
Note:
|
 | |
Turn off all virus protection software before you install the Stylus RIP Professional. To do this, see the documentation that came with your virus protection software or computer.
|
|
 |
Insert the CD-ROM that shipped with EPSON Stylus RIP Professional 2.0 into your CD-ROM drive. The EPSON Stylus RIP Professional window automatically appears on your screen.
|
 |
Open the OS9_Installer folder, and then double-click the Installer_    icon. icon.
|
 |
Click Continue on the screen that appears.
|
 |
Click the installation pop-up menu, and then select Custom Install.
|

 |
Select the item(s) that you want to install.
|

 |
Click Install to begin installation.
|
 |  |
Note:
|
 |  | |
The installer automatically saves the Stylus RIP Professional files on the root level of your hard disk. If you want to change the location where the files are installed, click the Install Location pop-up menu, and then select Select Folder to specify the location.
|
|
 |
Click Quit to complete the installation.
|

[Top]
| Version 1.00E, Copyright © 2003, SEIKO EPSON CORPORATION |

Before installing the Stylus RIP Professional
Mac OS X users
Mac OS 8.6/9.x users


 icon.
icon.


 icon.
icon.


 icon. The following screen appears.


 icon.
icon.


