Registering Printers
Follow these instructions to register printers to Epson DC Agent for ECSP.
-
Connect the printer you want to register to Epson DC Agent for ECSP to the network. USB connections are not supported.
-
Assign the printer a static IP address. Printer information will not be collected if the IP address is automatically allocated.
-
Do not register the same printer with more than one Epson DC Agent for ECSP. Otherwise, printer information may not be acquired correctly.
-
From the start menu, select Epson Software > Epson DC Agent for ECSP to run Epson DC Agent for ECSP.
-
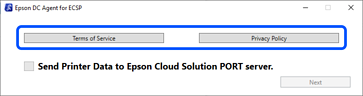
Read and accept the Terms of Service and Privacy Policy.
If you do not accept the terms, the installation process will not continue.
-
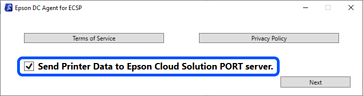
Select Send Printer Data to Epson Cloud Solution PORT server.
-
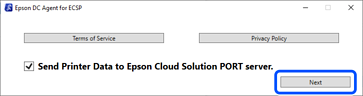
Click Next.
-
Click Log in.
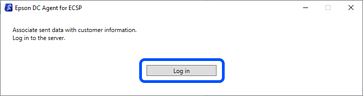
- The Epson Cloud Solution PORT login page opens in your browser.
Enter the Epson Cloud Solution PORT email address and password for Epson ID, and then click Login.
 Note:
Note:If identity verification is required, the system will email you a verification code. Follow the instructions in the email to complete verification.
-
If the login is successful, the authentication completion message is displayed. Click OK, then close your browser.
-
The registering printers screen is displayed. Click Search for printers.
When printers are found, they are displayed as a list.
 Note:
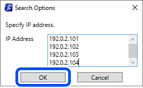
Note:If the printer is not displayed, specify the IP address.
1. Click Search Options, and then enter the IP address of the printer on the search options screen.

2. Click OK to close the search options screen, and then start the printer search.
-
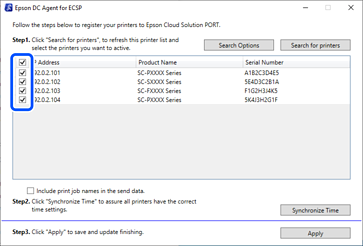
Select the printers you want to register.
To send the job name, select Include print job names in the send data. If this is not selected, the job names are not included in the sent data.
Note:You can select or clear all with the checkbox at the top.
-
Click Synchronize Time.
You can set the current time for the selected printers.
-
Click Apply.
The printers are registered to Epson DC Agent for ECSP.
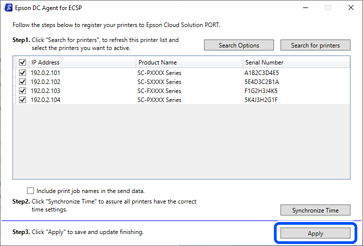
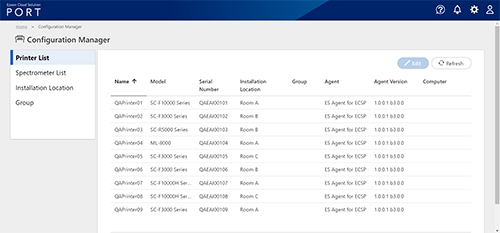
Printer information that is registered here is sent to the Epson server, and Epson Cloud Solution PORT is registered to the Printer List in Configuration Manager.
-
Click OK to apply the settings.
-
Click OK on the confirmation screen.