Checking Spacer Combinations and Platen Height (Scale)

Check the spacer combination and platen height (position of the scale on the platen gap lever) and make sure they are appropriate for the thickness of the media you are using.
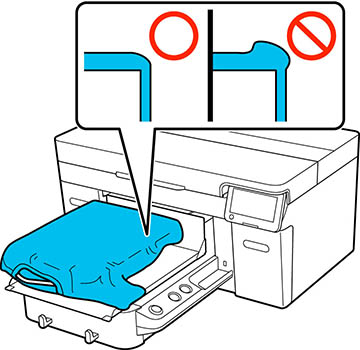
Note: When loading media flat onto the platen (with both the front and back of the T-shirt on top of each other), check the thickness of the front and back of the shirt.

When the media thickness is up to 0.08 in (2 mm):

A typical T-shirt or polo shirt is about 0.08 inch (2 mm) in thickness.
  • If you are using a standard or a hanger platen, use both spacers A and B, and set the scale for the platen gap lever to position P.
  • If you are using the sleeve platen or the medium-grooved platen, use only spacer B and set the platen gap lever to position P.
Note: If a message appears about the media surface height when printing is started, either the media is incorrectly loaded or the thickness of the media exceeds 0.08 in (2 mm). If the message continues to appear after reloading the media, see the section below.

When the media thickness is 0.08 in (2 mm) or more, or if you are not sure:

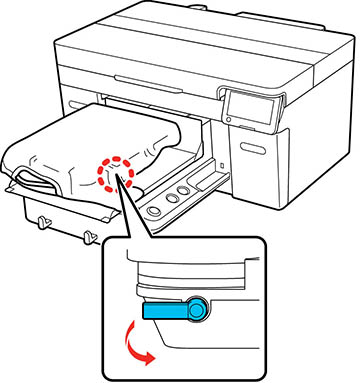
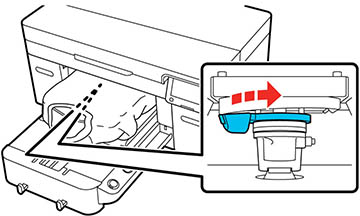
  1. Make sure the platen you want to print on is installed and the correct media is loaded.
    Note: The Platen Height Adjustment setting is adjusted to match the media loaded in the printer. Load the media so it is flat with no slack or creasing on the media surface as shown.


  2. Select Menu > Platen Height Adjustment.
  3. Do one of the following:
    • If you are using a standard or hanger platen, go to step 5.
    • If you are using a sleeve or medium-grooved platen, go to the next step.
  4. Select Settings, select the type of platen you are using, and then close the screen.
  5. Rotate the fixing lever beneath the platen as shown to loosen it.


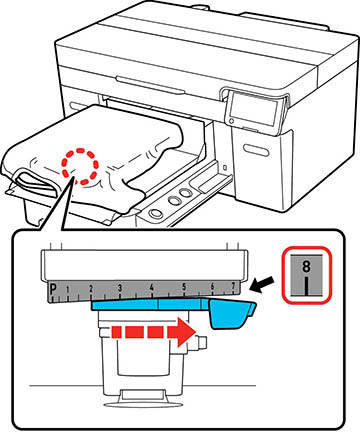
  6. Rotate the height adjustment lever to set the scale to 8.


  7. Select Done, and then select Start on the next screen. The platen moves into the printer.
  8. Do one of the following:
    • If a message about the media surface height or movable base appears, you need to adjust the spacers. Go to the next step.
    • If no message appears on the LCD screen, go to step 10.
  9. Change the spacer combination you are using according to the tables below: When using a standard or hanger platen:
    Media thickness* Spacers
    0.24 to 0.47 inch (6 to 12 mm) Attach to A only
    0.47 to 0.63 inch (12 to 16 mm) Attach to B only
    0.63 to 0.94 inch (16 to 24 mm) Remove all

    * When using a platen without a grip pad, 0.04 inch (1 mm) thicker than the values in the table is acceptable.

    When using the sleeve or medium grooved platen:

    Media thickness Spacers
    0.28 to 0.55 inch (7 to 14 mm) Remove all

    If you cannot make adjustments even after changing the spacer combination, measure the media thickness and see the link below.

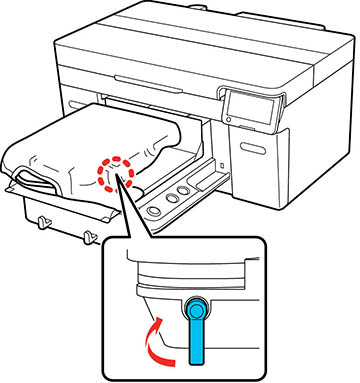
  10. Move the lever to the left by one notch on the scale to locate the position where the media surface height error is displayed and a beep is heard.


  11. Move the lever to the right by one notch to locate the position where the error sound stops.


  12. Select OK and then select Done on the next screen.
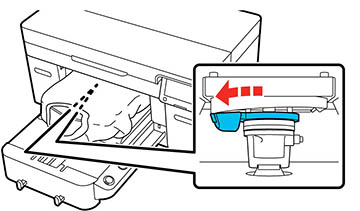
  13. Rotate the fixing lever as shown to tighten it and then secure the platen gap lever.


Related tasks
Attaching or Removing Spacers
Related references
Platen Height Error Is Displayed While Printing