![]()
Reference Guide
| Index | Help | Safety | ||||||||
| Contents | Glossary |
|
||||||||
|
|
|
|||||||||||||||||||||||||||||||||
How To / How to Set Up the Network Interface
Connecting the network interface
Configuring the network interface
Setting up the device
Use EpsonNet Config to configure the network interface for use on the TCP/IP network and set up the printer on your computer.
| Note: |
|
 | Insert the Software CD-ROM in the CD-ROM drive. |
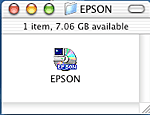
 | Double-click the EPSON CD-ROM icon. |
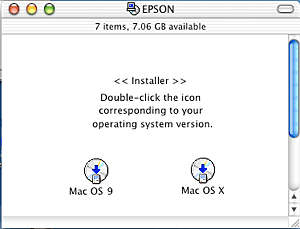
 | Double-click the appropriate OS icon in the EPSON folder. |
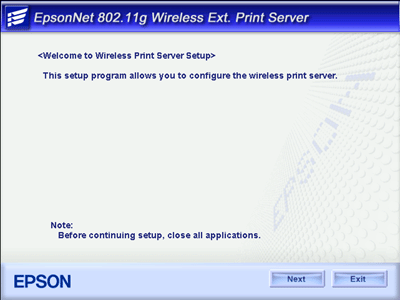
 | From the Welcome screen, click Next. |
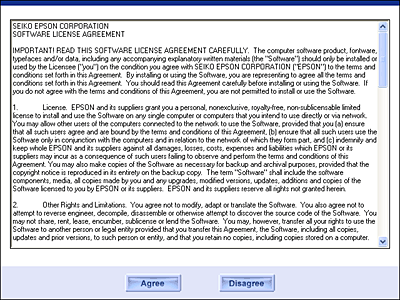
 | Read the license agreement, and then click Agree. |
 | Select Install Network Utility. |

 | Click the Install button located next to EpsonNet Config to install EpsonNet Config. Follow the on-screen instructions to complete the installation. |

 | Restart your computer. |
 | Connect the square connector to the USB port on the device, and then connect the other end to the USB downstream connector on the network interface. Finally, turn on the device. |
| Note: |
|

 | Connect the square connector on the USB cable to the USB upstream connector on the network interface, and then connect the other end to the USB port on the computer. |

 | Connect the power cord to the AC adapter, and then plug the AC adapter into the network interface's DC-IN connector. Finally, plug the power cord into a properly grounded wall outlet. |
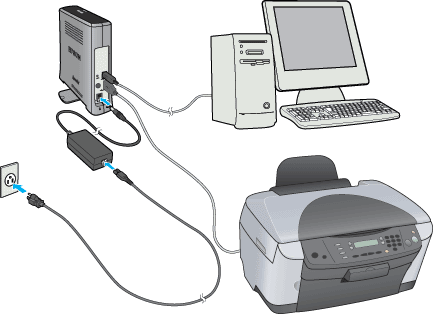
 | Configure the network interface using EpsonNet Config. See Configuring the network interface for details. |
| Note: |
|
 | Double-click the Macintosh HD icon. In the Applications folder, double-click the EpsonNet folder, and then double-click the EpsonNet Config folder. Finally, double-click the EpsonNet Config icon. |

 | Select the device and then click the Configuration button. |
 | Select Basic under Network. Make the following settings. |
|
Items |
Explanations |
|
Communication Mode |
Select a wireless LAN mode: Infrastructure or Ad Hoc. |
|
Operation Mode |
For 802.11g only: |
|
SSID |
Enter or select the SSID (or ESSID) of the access point or wireless LAN (up to 32 characters). |
|
Channel |
When the mode is Ad Hoc, select the channel used on the network interface. If the mode is Infrastructure, this item is dimmed. |
|
Transmission Rate |
Select the transmission speed from the list. |
 | Click Security Level under Network. Make the following settings. |
|
Items |
Explanations |
|
Security Level |
Select the security level from the list.
Note: |
|
WEP Authentication Method |
Select an authentication algorithm: Open System, Shared Key, or Automatic. |
|
WEP Settings (appears for WEP-64bit or WEP-128bit security level) |
|
|
Input using hex |
Select this check box to set the WEP Key in hexadecimal. |
|
WEP Key (1 to 4) |
When you select 64 bit(40 bit) for the length, you can set up to 4 WEP Keys. When you select 128 bit(104bit), you can set only one WEP Key.
For 64bit and ASCII, enter 5 characters.
Note: |
|
Active WEP Key |
Select one WEP Key as an active key before enabling use of encryption. |
|
WPA Settings (appears for WPA-Personal security level) |
|
|
Password |
Enter the password for WPA-Personal authentication (8 to 63 characters). |
|
Password (again) |
Enter the password again. |
 |
For Mac OS X: Click Basic under TCP/IP. Select a method for specifying the IP address. If you select Automatic, DHCP becomes available and assigns an IP address automatically. If you want to set the IP address manually, select Manual and enter the IP address, subnet mask, and default gateway. |
For Mac OS 9:
Click Basic under AppleTalk. Make sure the Use AppleTalk check box is selected, and then make the necessary settings.
 | Click the Send button to send the settings to the network interface. |
 | Pull out the USB cable from your computer and the network interface. |

 | Set up the device. See Setting up the device for details. |
The printer driver must be installed on the computer before you can set up the device. See the device's manual for information on installing the printer driver.
 | Open the Applications folder. |
 | Open the Utilities folder. |
 | Open Print Center (for Mac OS X 10.2 or below) or Printer Setup Utility (for Mac OS X 10.3), and then click Add. |
 | Select Rendezvous from the drop-down list. |
 | Select the printer model from the list. |
 | Click Add. |
 | Open Chooser from the Apple menu. |
 | Click the printer icon. |
 | Select the zone containing the printer. |
 | Select the printer name from the list. |
 | Make sure AppleTalk is active. |
 | Close Chooser. |
Now you can use the device on the wireless network.
 Previous |
 Next |
| Version 1.00E, Copyright © 2003, SEIKO EPSON CORPORATION |