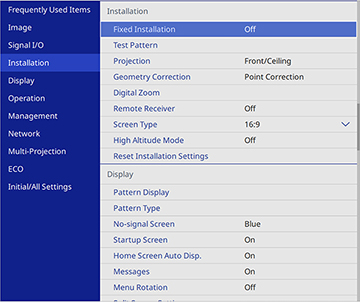
| Fixed Installation
|
On
Off
|
Set to On if you
installed the projector in a fixed location |
| Test Pattern
|
— |
Displays a test pattern to assist in focusing and
zooming the image and correcting image shape |
| Projection
|
Front
Front/Ceiling
Rear
Rear/Ceiling
|
Selects the way the projector faces the screen so the
image is oriented correctly |
| Geometry Correction
|
H/V-Keystone
Quick Corner
Arc Correction
Point Correction
|
Adjusts image shape to rectangular (horizontally and
vertically)
H/V Keystone: lets
you manually correct horizontal and vertical sides
Quick Corner: select
to correct image shape and alignment using an on-screen display
Arc Correction:
select to adjust the curve or arc of the horizontal and vertical
sides
Point Correction:
select to divide the projected image into a grid and correct
distortion by moving a selected point |
| Digital Zoom
|
Varying levels available |
Adjusts the size of the projected image |
| Remote Receiver
|
Front/Rear
Front
Rear
Off
|
Limits reception of remote control signals by the
selected receiver; Off turns off
all receivers |
| Screen Type
|
4:3
16:9
16:10
|
Sets the aspect ratio to fit the image on the
projection surface |
| Screen Position
|
Varying positions available |
Shifts the image position on the screen (only available
if the Screen Type setting is not
set to the same aspect ratio as the projector's native
resolution) |
| High Altitude Mode
|
On
Off
|
Regulates the projector's operating temperature at
altitudes above 4921 feet (1500 m) |
| Reset Installation
Settings
|
— |
Resets all settings on the Installation menu to their
default values except for the following:
|