
You can set up security for your projector to use on a wireless network. Set up one of the following security options to match the settings used on your network:
WPA3-PSK security
WPA2/WPA3-PSK security
WPA3-EAP security
WPA2/WPA3-EAP security

Contact your network administrator for guidance on entering the correct information.
When setting WPA3-EAP or WPA2/WPA3-PSK security, store the certificate in a format that is compatible with the projector in the root directory of the USB storage device.
Press the Menu button, select the Network menu, and press Enter.
Select Network Configuration and press Enter.
Select the Wireless LAN menu and press Enter.
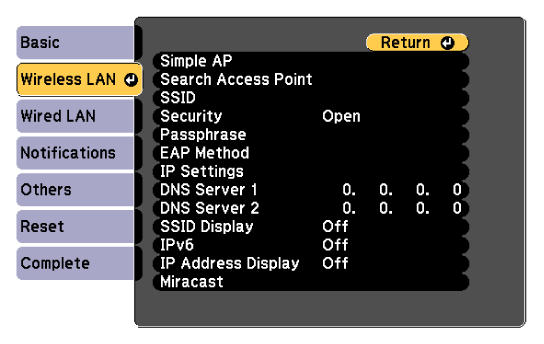
Select the Security setting and press Enter.

Select the security settings to match your network settings.
Do one of the following according to the security you selected.
WPA3-PSK or WPA2/WPA3-PSK: Select Passphrase, press Enter, and enter a passphrase from 8 to 63 characters long. To enter more than 32 characters, use your Web browser. Then go to step 16.
WPA3-EAP or WPA2/WPA3-EAP: Select EAP Method and press Enter.
Select the protocol for authentication as the EAP Type setting.
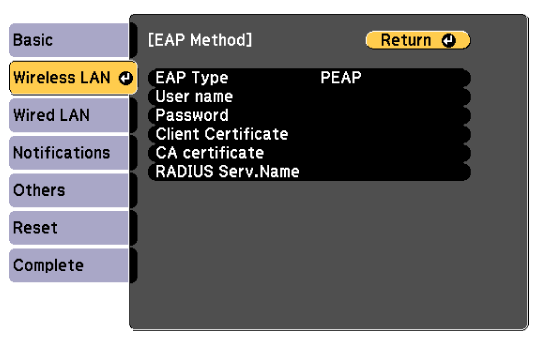
To import your certificate, select the certificate type and press Enter.
Client Certificate for the EAP-TLS type
CA certificate for all EAP types
You can also register the digital certificates from your Web browser. However, be sure to register just once or the certificate may not install correctly.
Select Register and press Enter.
Follow the on-screen instructions to connect a USB storage device to the projector's USB-A port.
Press Enter to display the certificate list.
Select the certificate to import using the displayed list.
Enter a password and press Enter.
Select your EAP settings as necessary.
User name lets you enter a user name using up to 64 alphanumeric characters. To enter more than 32 characters, use your Web browser. When importing a client certificate, the name the certificate was issued to is automatically set.
Password lets you enter a password using up to 64 alphanumeric characters for authentication when using the PEAP type. To enter more than 32 characters, use your Web browser.
RADIUS Serv.Name lets you enter the server name to be verified.
When you have finished making settings, select Complete and follow the on-screen instructions to save your settings and exit the menus.
 Related Links