
To set up your projector for monitoring and control using a Crestron Connected system, make sure your computer and projector are connected to the network.
Press the Menu button, select the Network menu, and press Enter.
Select Network Settings and press Enter.
Select the Projector Control menu and press Enter.
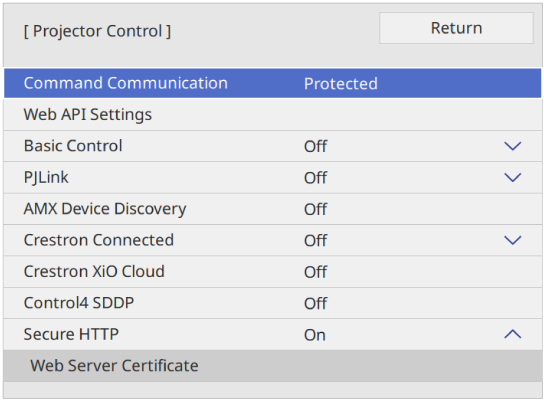
Set the Crestron Connected setting to On to allow the projector to be detected.

If no password has been set, a screen prompting you to set a password is displayed before you can set Crestron Connected to On. Follow the on-screen instructions to set the password.
To enable the Crestron XiO Cloud service, set Crestron XiO Cloud to On.
When you finish selecting settings, go back to the Network Settings screen, select Set, and follow the on-screen instructions to save your settings and exit the menus.
Turn off the projector, and then turn it on again to enable the setting.
Start your Web browser on a computer or device connected to the network.
Go to the Epson Web Control screen by entering the projector's IP address into the browser's address box.
Select the Crestron Connected settings. See the Crestron website for details.