
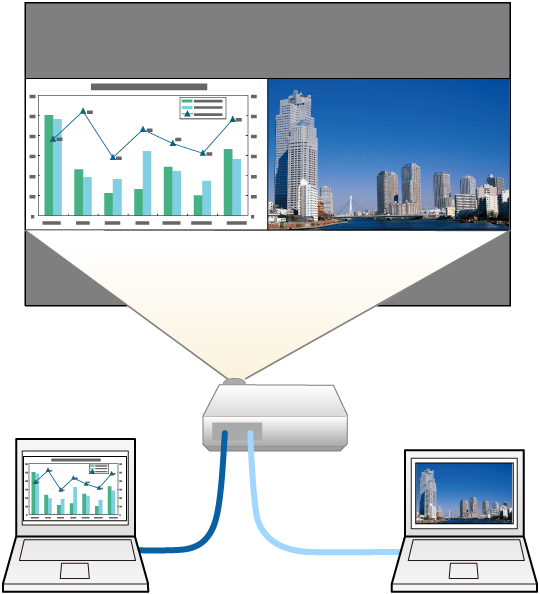
You can use the split screen feature to simultaneously project two images from different image sources. You can control the split screen feature using the remote control or the projector menus.

While using the split screen feature, other projector features may not be available and some settings may be automatically applied to both images.
Press the Split button on the remote control.

You can perform the same operations from Split Screen in the projector's Settings menu.
Press the Menu button.
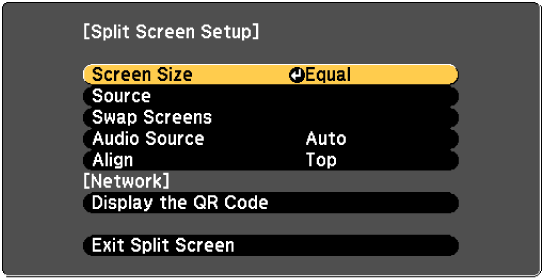
To select an input source for the other image, select the Source setting, press Enter, select the input source, select Execute, and press Enter.
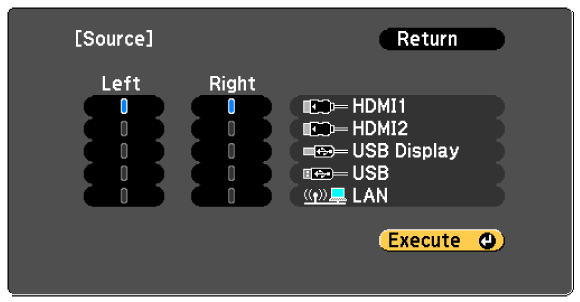
You can only select input sources that can be combined.
While using the split screen feature, the Source screen appears when you change the input source from the remote control.
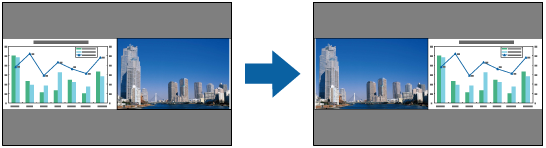
To switch images, select Swap Screens and press Enter.
To enlarge one image while reducing the other image, select Screen Size, press Enter, select a size, and press Enter. To exit the menu, press Menu.
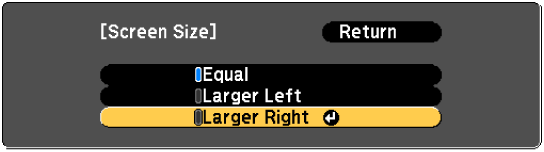
Depending on the video input signals, the images may not appear at the same size even if you select Equal.
To select the audio, select Audio Source, press Enter, select an audio option, and press Enter. To exit the menu, press Menu.
Select Auto to hear audio from the largest screen or the left screen.
To align the projected images, select Align, press Enter, select the setting, and press Enter again. To exit the menu, press Menu.
To exit the split screen feature, press Split or Esc.
 Related Links