
If your computer meets the system requirements, you can send video and audio output to the projector through the computer's USB port. This function is called USB Display. Connect the projector to your computer using a USB cable.

If you use a USB hub, the connection may not operate correctly. Connect the USB cable directly to the projector.
Connect the cable to your projector's USB-B port.
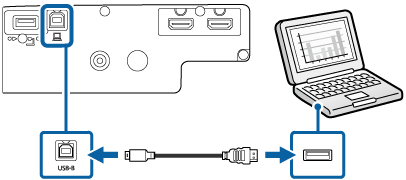
Connect the other end to any available USB port on your computer.
Turn on the projector and your computer.
Do one of the following to install the Epson USB Display software:
You only need to install this software the first time you connect the projector to the computer.
Windows: Select Run EMP_UDSE.EXE in the dialog box that is displayed to install the Epson USB Display software.
Mac: The Epson USB Display setup folder is displayed on your screen. Select USB Display Installer and follow the on-screen instructions to install the Epson USB Display software. If the USB Display Setup folder is not displayed automatically, double-click EPSON_PJ_UD > USB Display Installer.
Follow any on-screen instructions.
If the projector does not project any images, do one of the following:
Windows: Click All Programs > EPSON Projector > Epson USB Display > Epson USB Display Ver.x.xx.
Mac: Double-click the USB Display icon in the Application folder.
When you finish projection, do one of the following:
Windows: Disconnect the USB cable. You do not need to operate Safely Remove Hardware.
Mac: Select Disconnect from the USB Display icon menu on the menu bar or Dock, and then disconnect the USB cable.
 Related Links