
Introduction to Your Projector
Using Basic Projector Features
Blending Using the Epson Projector Professional Tool Software and the Optional Camera
Simple Blending Using the Projector's Menu and the Optional External Camera
Stacking Using the Epson Projector Professional Tool Software and the Optional Camera
Stacking & Blending Using the Epson Projector Professional Tool Software
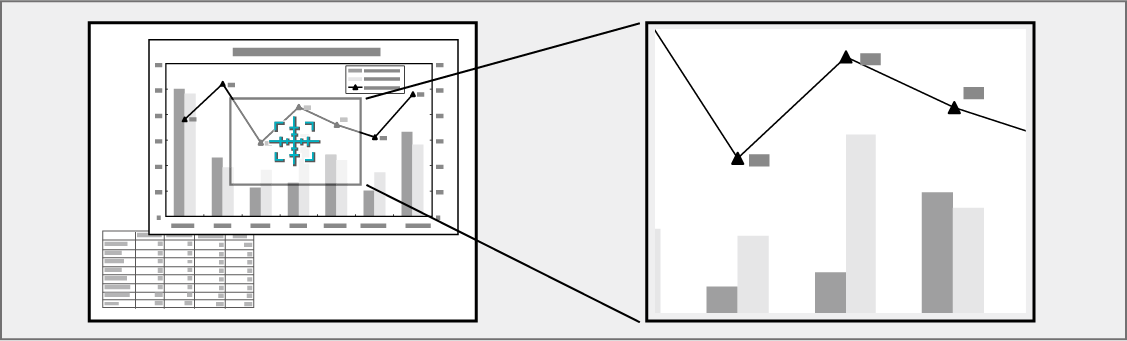
You can draw attention to parts of a presentation by zooming into a portion of the image and enlarging it on the screen.

This feature is unavailable if the Scale setting in the projector's Image menu is enabled.
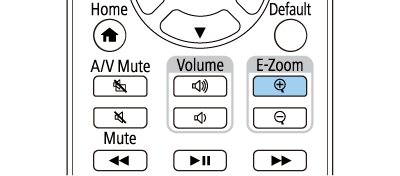
Press the E-Zoom + button on the remote control.
Use the following buttons on the remote control to adjust the zoomed image:
Use the arrow buttons to position the crosshair in the image area you want to zoom into. To move the crosshair diagonally, press any pair of adjacent arrow buttons at the same time.
Press the E-Zoom + button repeatedly to zoom into the image area. Press and hold the E-Zoom + button to zoom in more quickly.
To pan around the zoomed image area, use the arrow buttons.
To zoom out of the image, press the E-Zoom – button.
To return to the original image size, press Esc.
You can enlarge the selected area to between one to four times in 25 incremental steps.
When projecting images from an Epson document camera using a USB connection, you can enlarge the selected area from one to eight times its size in 57 incremental steps.