Before you can project from your wireless network, you need to select network settings for the projector.

To use the projector over a wireless network, install the Epson wireless LAN module (EB-L690SE/EB-L695SE).
Press the Menu button, select the Network menu, and press Enter.
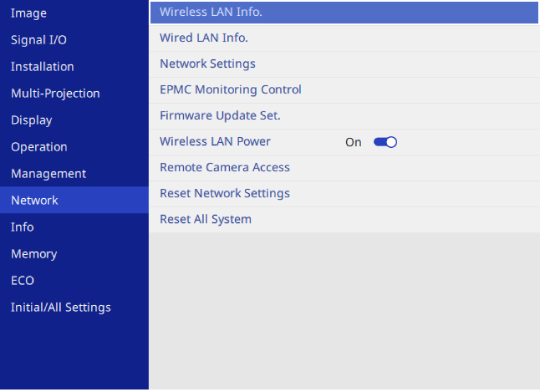
Set the Wireless LAN Power setting to On.
Select Network Settings and press Enter.
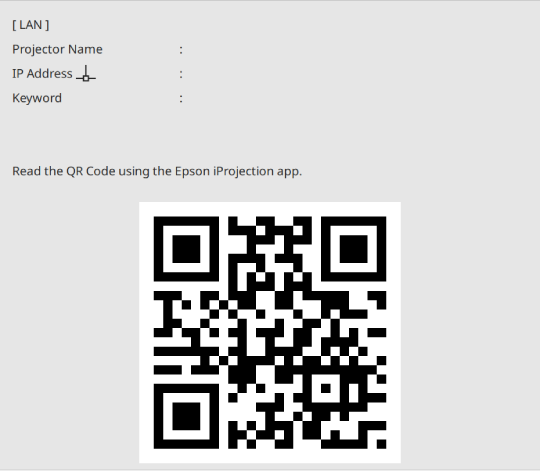
To identify the projector over the network, select Projector Name and enter a name up to 16 alphanumeric characters long.
Set the Priority Control Interface setting to Wireless LAN.
Select the connection method.
For simple AP mode, set the Simple AP setting to On and go to step 11.
For the access point connection, set the Simple AP setting to Off and go to next step.
If you want to use both connection methods at the same time, set the Simple AP setting to On and go to next step.
Select the Wireless LAN menu and press Enter.
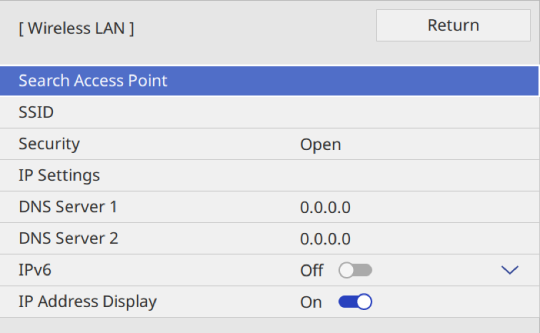
You can also search for access points using the Search Access Point setting manually.
Select the access point you want to connect to.
If you need to assign the SSID manually, select SSID to enter the SSID.
Assign the IP settings for your network as necessary.
If your network assigns addresses automatically, select IP Settings to set the DHCP setting to On.
If you must set addresses manually, select IP Settings to set the DHCP setting to Off, and then enter the projector's IP Address, Subnet Mask, and Gateway Address as necessary.
To prevent the IP address from being displayed on the network information screen, set the IP Address Display setting to Off.
Select the Network Projection menu and press Enter.

Turn on the Projector Keyword setting if you want to prevent access to the projector by anyone not in the room with it.
When you turn on this setting, you must enter a displayed, randomized keyword from a computer using Epson iProjection to access the projector and share the current screen.
Set the Epson iProjection setting to On.
Select the options as necessary.
SSID Display lets you select whether to display projector's SSID on the network information screen and Home screen.
LAN Info. Settings lets you set the display format for the projector's network information.
Moderator Password lets you enter a four-digit number password for accessing the projector as a moderator using Epson iProjection. (No password is set by default.)
Keyword Interrupt Display lets you select whether to display a projector keyword on the projected image when accessing the projector using Epson iProjection.
When you finish selecting settings, go back to the Network Settings screen, select Set, and follow the on-screen instructions to save your settings and exit the menus.
If no Web Control Password has been set, a screen prompting you to set a password is displayed before you can save the settings. Follow the on-screen instructions to set the password.
Press the Wireless button on the remote control to switch to the LAN source.